Category Archives: Cooks Illustrated

Kitchen ware recommended by Cook’s Illustrated.

Sous Vide Machines: Cooks Illustrated vs Amazon vs Good Housekeeping

One of Rick’s more profound theories of life is this: “Things lead to things.”

The fact that we now own the Cook’s Illustrated “highly recommended” sous vide machine, the Anova Precision Cooker, is a perfect example of Rick’s Theory of Thingage in action.

Sous Vide-2Here’s how it went down, this time:

We had recently moved near a Costco, started buying mozzarella cheese and fresh salmon in bulk, and found ourselves shelling out for a kitchen vacuum sealer.

In addition to learning about the best and worst of vacuum sealers, our research also revealed that vacuum bagged foods were “perfect for sous vide cooking.”

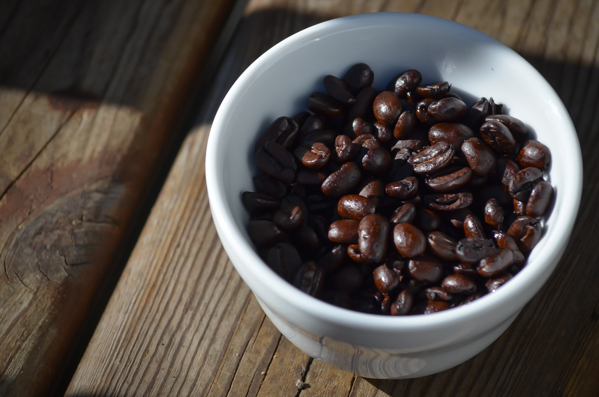
Well, that’s just dandy! And here we thought we were just buying a vacuum sealer to portion and preserve 25-lb bags of coffee beans and raw almonds into household-of-two portions.

Um… remind me again what “sous vide” cooking is?

Sous Vide-3
Sous vide—French for “under vacuum”—is a simple, fuss-free and time-tested way to slow cook food sealed in airtight plastic bags. It uses longer and lower temperatures than normal in a precisely temperature-controlled water bath that’s heated to the food’s desired final temperature.

Sous vide cooking gently locks in essential juices and amplifies flavor (and exquisite textures) while preserving vital water-soluble nutrients and improving food safety (no guessing!).

The method is used in everything from poached eggs (reportedly producing amazing yolk textures unattainable by any other means) to delicate fish to custards to chicken to vegetables and even tricky “easy to overcook/dry out” cuts of inexpensive meat such as flank steak.

Better food with less fuss? Sign us up.

Sous Vide-7
We wanted a sous vide machine that, a) didn’t break the bank and, b) we could find room to store in our kitchen.

Both requirements were met by passing on the bulky and more expensive “water ovens” that have been the only options, until recently.

Instead, the answer lay in the more affordable, flexible, and storage-friendly stick “immersion circulator” styles, a conclusion that both Cook’s Illustrated and Good Housekeeping came to in their reviews and recommendations.
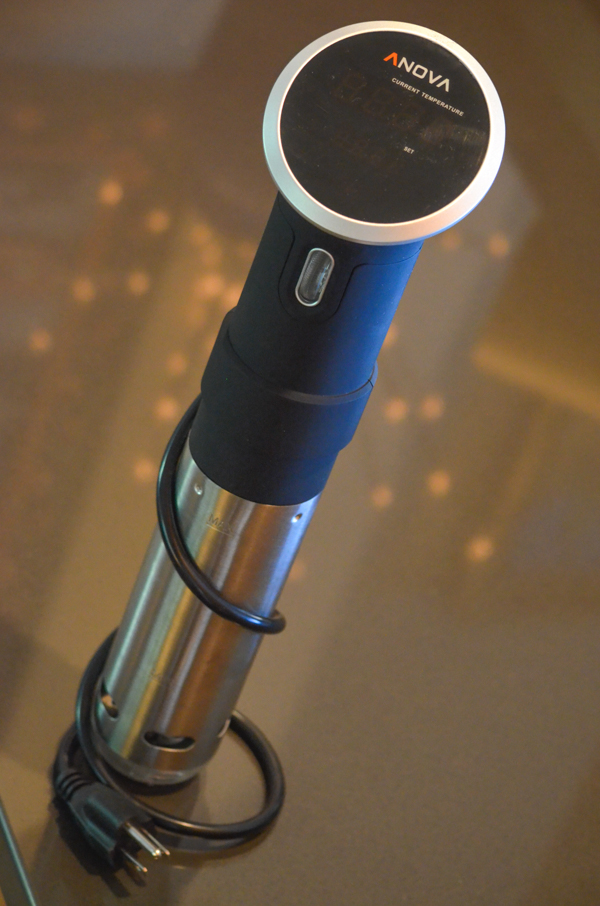
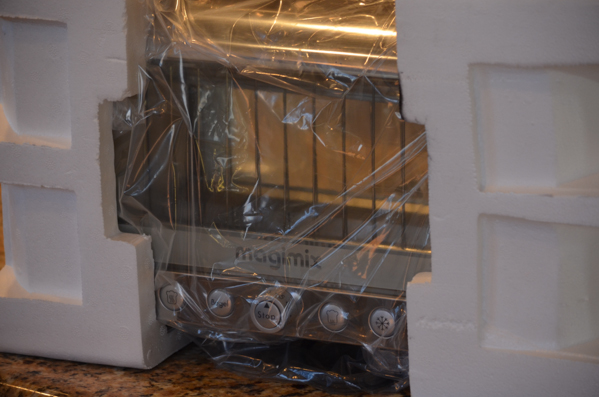

Anova Culinary Precision Cooker

(Technically speaking, the December 2014 Cook’s Illustrated “highly recommended” winner was the “Anova One,” but good luck finding one! Per Anova.com., the Anova One has been discontinued and has been replaced by the Anova Precision Cooker. Cook’s has committed to testing this new Anova soon. Stay tuned: we’ll update as soon as their results are in. Meanwhile, we’re loving the new model.)

At a current 4.5 star rating with over 300 reviews, the Amazon community thinks highly of this option. And at a (relatively) modest price tag of ~$180 USD, the Anova Precision Immersion Circulator—and sous vide cooking in general—is now within reach of us mere mortals, as opposed to being the quiet little secret of high-end restaurant chefs.

Even-tempered, quiet, gentle, a quick clean, and low maintenance… the Anova would make a terrific roommate.

Good Housekeeping reviewed two different sous vide machines, the Sansaire and the Nomiku.


Sansaire Sous Vide Immersion Circulator

Good Housekeeping gave them both an enthusiastic thumbs up without expressing a preference between the two. Great! But, not that helpful if you just want to know what the best sous vide machine is.

Once again, the Cook’s review shed some light on things. They ranked the Sansaire as their second-placed “recommended” option, and here’s why:

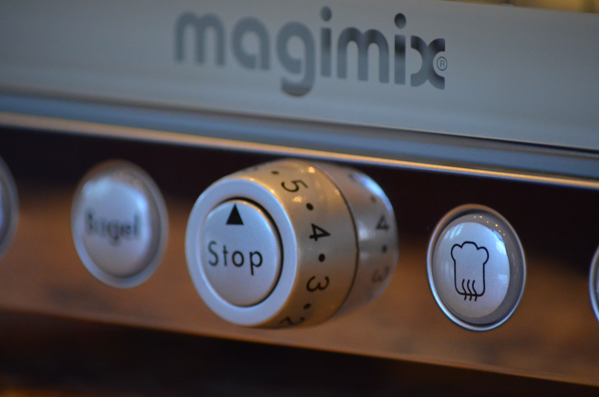
It’s about the outport, the vent where the water is circulated back into the pot after a trip around the heating element. The Sansaire has a fixed outport, meaning you can’t adjust where the flow of water is aimed in the container. The Anova, on the other hand, has a rotatable outport, meaning if the water churn is too vigorous for delicate items, you can rotate it to deflect against the wall of the pot instead of directly into the water.  This is, apparently, important if you don’t want your eggs to jostle audibly (and one presumes, in a manner threatening breakage) against the wall of the cooking container.

Albeit with roughly one third the number of reviewers, the review crew at Amazon rank the slightly more expensive Sansaire with a shade higher rating (4.6 stars) than the Anova. Why a higher ranking? This is not known at this time.

What is known is that no one reviewing the Sansaire complained about noisy eggs.


Nomiku Sous Vide Immersion Circulator

Cook’s Illustrated placed the Nomiku in their “recommended with reservations” spot, citing the squint-inducing “postage-stamp sized” display and narrower (and this is an important factor) water maximum-to-minimum range that meant more frequent monitoring and refills during a multi-day cooking task.

Amazonians were only so-so about the Nomiku, giving it 3.7 stars over ~180 reviews. Meh.

Enough about the machinery. Here’s how our first foray into Sous Vide Land went.

Sous Vide-4
We decided to try our new Anova out on the inexpensive $8 eye-of-round roast that Rick cut into 2-inch thick steaks.

Sous Vide-5
A healthy dose of salt and pepper on both sides—with our aromatic-of-choice, a sprig of fresh rosemary—as seasoning…

Sous Vide-6
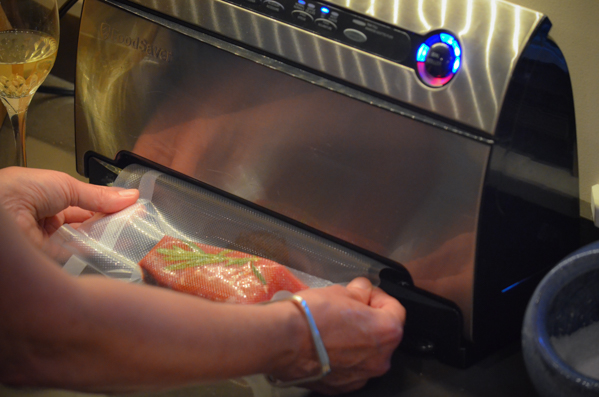
… a quick pit stop at our FoodSaver V3840 to seal in all the lean yet juicy loveliness, and into the tub they went for their 131° 24-hour water spa treatment. (More on time and temperature below.)

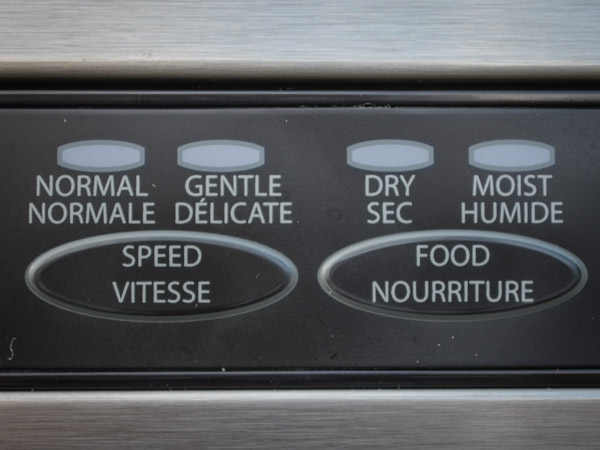
BTW, the Anova was super easy to use:

  • Clamp to stock pot or other suitable container
  • Fill with lukewarm-to-warmish (below the desired cooking temperature) water to somewhere between the “maximum” and “minimum” lines, depending on how big your bagged goodie is
  • Plug it in
  • For our North American buddies: hold down the “play” button for three seconds to switch between Celsius and Fahrenheit, or vice versa for the flipside
  • Dial the front wheely thing to the desired temperature
  • Hit “play”
  • Go away for anywhere from 20 minutes to 2 days, depending on what you’re cooking

Sous Vide-8
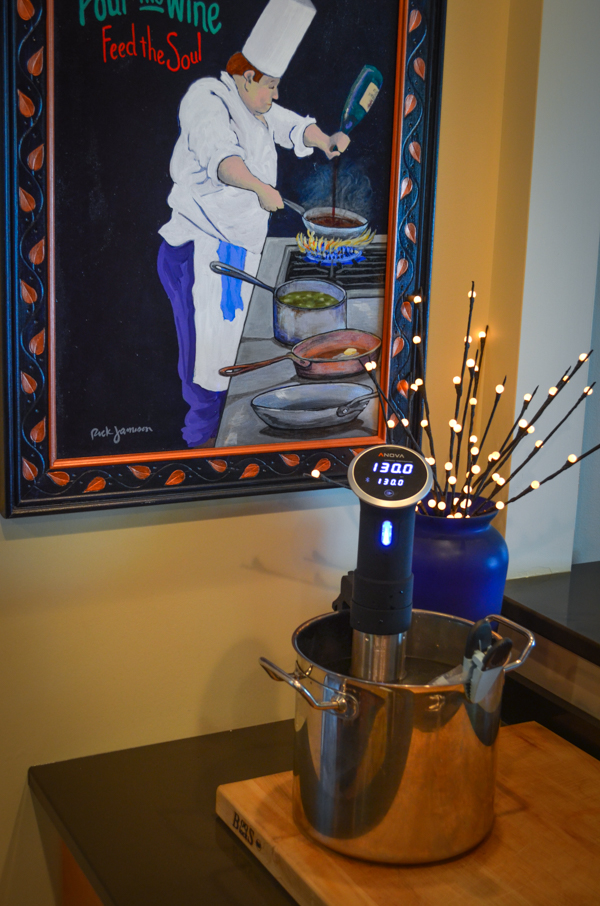
(In a complete aside: dontcha love the chef poster Rick painted?)

To make sure the bagged meat stayed totally submerged during the process, we clamped the bags in place, per a random online recommendation (probably from a Sansaire user). In hindsight, the circulation feature wasn’t torrential enough  to make that 100% necessary, but hey… safety first.

On that note, be sure to read the Anova manual before starting use, which clearly states, and I quoth directly from the Anova Precision Cooker user manual:

Sous Vide-16
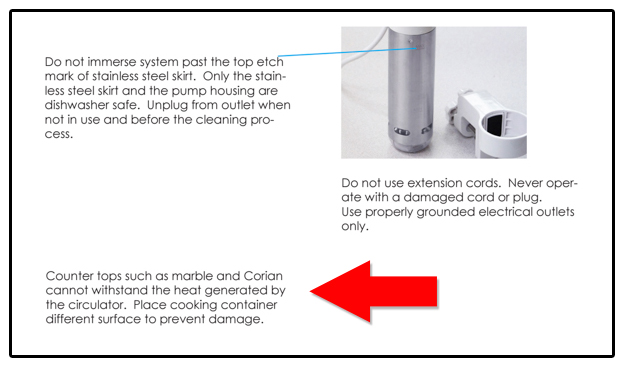
Whoops! Luckily, we caught it in the first hour of operation. We whipped our immersion circulation-enhanced stock pot off our brand-new Cambria quartz countertop and on to our trusty, indestructible butcher block. No harm, no foul.

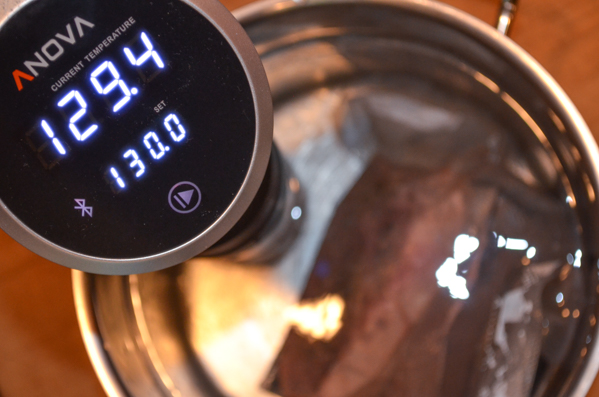
Right around the same time that we discovered the kitchen safety info, we also stumbled on a food safety recommendation, which said that the minimal temperature necessary to safely heat meat for the length of time we had planned is 131°F.

Rightio. Two clicks forward of the handy temp wheel, and there we were at 131°F for the next 23.5 hours.

About 14 hours into the process, we noticed that the water level had diminished slightly due to evaporation, so we topped it up a little and loosely tented a piece of aluminum foil at the top of our stock pot, but other than that, it was a completely hands-off gig.

Sous Vide-9
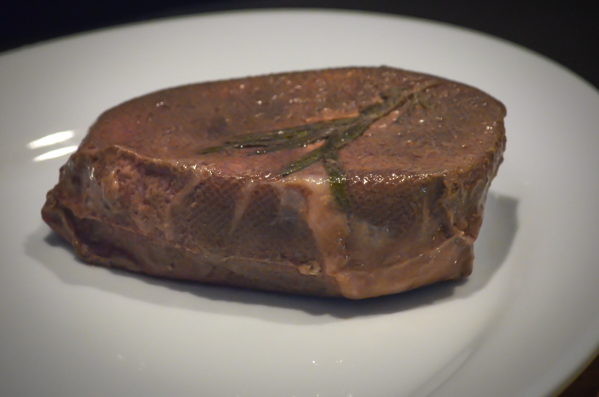
A full 24-hours later and this is what we removed from the bag: an inexpensive cut of beef cooked to a perfect medium.

However, as is the case for all sous vide meats, the external presentation needed a little touch up via a quick sear (think hot grill, hot pan, deep fry, etc.) to add that crispy, flavorful layer that every carnivore craves.


Fancy Schmancy Kitchen Torch Attachment

Apparently, there’s a fancy schmancy kitchen torch attachment that you clamp on to a standard propane cylinder torch that will make the searing even more exciting official effective, but we don’t have the fancy schmancy gizmo —yet—so Rick seared them briefly on both sides in a lightly-oiled saute pan.
Sous Vide-10I meant to take a photo of the meat getting its quick sear, but somehow I got distracted and lost the moment.

Oh well.

I now have this exquisite photo of one of my favorite things: an upturned sleeve snugged firmly against the very cherished forearm of a lovely man cooking me a delicious dinner.

Sous-Vide-12
Ahh….

It was moist, flavorful, tender and perfect all the way through.

 Sous Vide-14From Michael Pollan in “Food Rules” to gurus in Psychology Today, those in the know are saying that it’s a good idea to leave a little food on your plate at the end of a meal.

I don’t think this is what they meant, but I did force myself not to eat it anyway, just for the sake of personal discipline.

I gave it to Winston instead.


Helpful Sous Vide Resources

Sous Vide Cookbooks


Under Pressure: Cooking Sous Vide

This is a well-rated and gorgeously produced volume by Thomas Keller, chef and author of The French Laundry Cookbook and Bouchon among others. According to the official Amazon.com review by Arthur Boehm:

The book makes no bones about being addressed to professionals. Typical recipes, like Marinated Toy Box Tomatoes with Compressed Cucumber-Red Onion Relish, Toasted Brioche, and Diane St. Claire Butter, involve multiple preparations and dernier cri ingredients, and thus resist home duplication.

Given we have no idea what “dernier cri” ingredients might be—”behind the scream”?—we don’t want ’em and are more interested in the simple, fuss-free aspects of sous vide cooking, so we’re leaving this one on the shelf at Amazon.

However, if you’ve got a coffee table book-loving, trend-conscious foodie on your Christmas list, go for it!


Modernist Cooking Made Easy: Sous Vide

Published in 2014 (aka, newer) and available in paperback for around $20 (Kindle for $10), this more modest tome by passionate home cook, Jason Logsdon, gets high marks from reviewers looking for a solid primer with easy recipes.

Sous Vide Cooking Timing Chart

One of the first things we noticed about our new Anova Precision Cooker was, well, its precision. The temperature is calibrated to 0.1°, which instantly appealed to the geek in both of us as we imagined the prospect of producing perfect, predictable results with any food we cook.

But, as is the case for the rest of life, it’s always a bit more complicated than that.

Yes, the Anova Precision Cooker will keep a water bath at a precise temperature for a specific time period, but good luck finding a time/temperature chart that’s equally exact!

When searching the web for guidance on how long to cook our first dish (the 2″ thick eye of round steaks above) and at what temperature, we noticed right away that different “authoritative” sources don’t seem to agree on much of anything except how to cook root vegetables (183°F or so for 1-4 hours-ish):

Anova
Codlo
ChefSteps
°F
Hours
°F
Hours
°F
Hours

Beef Roast (Med Rare)

134°
1-4
131°
4:30-6:30
140°
6-14
Beef Brisket (Med Rare)
134°
8-30
131°
24-36
149°
16-24
Pork Roast
160-176°
12-30
167°
8-12
144°
3-4
Baby Back Ribs
165°
4-36
Leg of Lamb (Med Rare)
134°
10-48
131°
8-24
Chicken Breast
146°
1-4
143.5°
1-3
149°
1-2
Chicken (Dark Meat)
160°
4-8
149°
1.5-3
149°
1.5-4.5
Fish
126°
0:20-0:30
122°
0:30
122°
0:40-1:00
Egg (Creamy Yolk)
143°
1
Egg (Thick Yolk)
147°
1
148°
1
Egg (Hard Yolk)
160°
1
Root Vegetables
183°
1-4
183°
1-4
185°
1-3
Fruit (Apple)
134°
1-4
183°
0:45-1:30
154°
1:45-2:30
Sources: Anova, Codlo, ChefSteps

Interestingly, we also noted that most of the temperature recommendations we found were well below the thresholds considered safe by the USDA:

Safe Minimum Internal Temperatures

Food
°F
°C
Beef / Pork / Veal / Lamb
145°
62.8°
Poultry
165°
73.9°
Eggs
160°
71.1°
Fish / Shellfish
145°
62.8°
Source: USDA

How could the range be so wide, especially when sous vide enthusiasts tout the added safety benefits of the method? Not to mention our own experience, which is that we wouldn’t have wanted the steak any more well done than it was, and that was accomplished at a max temp of 131°F?

We discovered the explanation to the temperature/food safety riddle in this chart that shows the “Danger Zone” for harmful bacteria (salmonella and E. coli).

According to the chart, bacteria is killed instantly at 145°F. Given that the USDA is responsible for providing recommendations to everyone in the U.S. cooking everything by every method, this is logically where they must weigh in for meat.

However, the nasty bacteria will also be killed off eventually at temperatures above 130°F, given adequate sustained cooking time. It’s the combination of time and temperature that yields food that’s safe, for sure, to eat.

Sweet.

But what about the wide range of target sous vide cooking times and temperatures recommended by different sous vide authorities?

Our conclusion is that sous vide cooking is part art, part science, part personal preference in food “doneness,” and part learning how to partner effectively and safely with a new machine in your kitchen.

Bottom line: we’re just going to have to enjoy spending a bunch more time hanging out in our kitchen together as we figure out what works best, for us.

Good Housekeeping review: What the Heck Is Sous Vide?

Cook’s Illustrated: Sous Vide Machines Review

Vacuum Sealer: Cooks Illustrated vs Amazon

While Consumer Reports hasn’t weighed in on which is the best vacuum sealer (yet), Cook’s Illustrated and the reviewer community at Amazon are singing together nicely on the subject.

We ended up buying a vacuum sealer somewhere in the middle of the melody line: the FoodSaver V3840.

Vacuum sealer cartoon by Rick Jamison

Have I mentioned that we recently moved to a new home that has both a Costco within a 10-minute drive AND a fish dock where local fishermen bring their catch almost daily? And that Rick has an extreme obsession a hearty enthusiasm for bargains, fresh food acquired as close to the source as possible, and provisioning our larder?

This new situation had us running both out of freezer space and into the risk of losing frozen fish due to freezer burn and/or expired “use by” dates. It was clearly time to either:

a) Buy a chest freezer (no room)

b) Stay out of Costco (ha!)

c) Eat fish every meal for the next six weeks straight (nope, no can do), or

d) Buy a vacuum sealer

Rightio!

Time to tune in to the home vacuum sealer rating game.


Weston Professional Advantage Vacuum Sealer

In the recent Cook’s Country—sister magazine of Cook’s Illustrated—review of vacuum sealers, the Weston Professional Advantage Vacuum Sealer (above) came out on top. While it doesn’t seem to have much traction at Amazon with only 3 ratings (4.7 out of 5) and 2 reviews, I suspect the just under $200 price tag is the driver there. Between Cook’s and the two reviewers on Amazon, though, this model gets a lotta love.

The Amazon reviewers were light on specifics in the midst of their gushing: “This is the best vacuum sealer and I have had others…” and “I love this after I learned how to use it. It’s working wonders. Love it.”

Cook’s was more specific:

“This compact, powerful heat-sealing model kept food fresh for three months and counting. Its intuitive interface has a responsive pulse mode and bright blue lights that indicate its progress. It works with a wide variety of bags, canisters, and rolls that were the cheapest of any sealer in our lineup.”

foodsaver-vacuum-sealer_rickandkathy.com-6

And thank you Cook’s for that last tidbit, because here we pause for a brief and entirely relevant tangent: you need to have vacuum sealer bags or customizable plastic rolls-waiting-to-be-turned-into-vacuum-sealer-bags for any of these models to work.

And while Weston (and Cook’s) claim that this model will work with a variety of bag brands (as long as they’re textured or embossed bags that are intended for use with vacuum sealers), several of the reviewers on Amazon vigorously claimed otherwise, specifically mentioning that Food Saver bags don’t work with the Weston. However, based on a cost comparison of  current “list prices” on Amazon*, this shouldn’t be a problem since the Weston bags are less expensive anyway.

Cost Comparison: 11″ Vacuum Sealer Rolls

Brand
Product
Cost*
Cost / Foot

$25.96

(3) 16′ Rolls

54¢

$23.57

(3) 18′ Rolls

44¢

$12.99

(2) 9′ Rolls

72¢
Generic

$32.97

(2) 50′ Rolls

33¢

* Cost = Discounted prices @ Amazon.com as of 10/5/2014

A few tips on getting the most from your bags:

  • Cut the bags several inches longer than you need. Once you open them, you can then wash them out and re-use them.
  • Avoid the generic brands: the reviewers say they have a seriously low success rate at sealing, meaning you end up spending as much or more anyway with added work for your trouble.
  • For models without a “moist” setting, freeze wet foods before sealing to avoid getting moisture in the sealing zone. Moisture will prevent a solid seal.
  • While I’m not certain about the other brands, the FoodSaver brand bags are BPA free, microwavable, and because they’re suitable for simmering, perfect for the increasingly popular “sous vide” style of cooking. (UPDATED SEPT. 2015: Find out what sous vide machine Cook’s Illustrated now recommends, and which one we bought.)

Close behind the Weston Professional Advantage Vacuum Sealer is the Waring Pro Pistol Vac Professional Vacuum Sealer System, which Cook’s Country rates as their “Recommended – Best Buy.”


Waring Pro Pistol Vac Professional Vacuum Sealer System

Okay, so maybe it’s just me, but this looks so much like my blow dryer that it made me nervous: what if I got them mixed up?

Plus, the idea of me using a “handheld” powered vacuum in the same vicinity as a piece of slippery fresh fish conjured to mind the probability of a Chevy Chase-like kitchen scene that Rick would rather not have to clean up. I have no clue how you would use such a thing.

In fact, I had no clue how to use a non-handheld model either, until we got one and I found out how easy it is.

In the middle of the pack, Cook’s Country recommends three vacuum sealers “With Reservations”: the FoodSaver 2-in-1 Vacuum Sealer System, the FoodSaver Vacuum Sealing System*, and the Seal-A-Meal Vacuum Food Sealer.

Of the five models that Cook’s recommends, we actually didn’t buy any of them but went with a ringer instead.


FoodSaver V3840

As you can tell from the video, in the end we bought a FoodSaver V3840. Serendipitously, it features everything that Cook’s liked about the other two FoodSaver models and avoided the bulk of the one and concern about durability of the other:

foodsaver vacuum sealer_rickandkathy.com-3

  • It automatically grabs, vacuums, and seals the bags.
  • It has a roll storage compartment with a built-in plastic slicer that tidily cuts bags to size.

foodsaver vacuum sealer_rickandkathy.com-5

  • It has both a normal and “gentle” vacuum setting, plus a manual override option that allows you to stop the vacuuming operation before it crushes more delicate or compressible items such as bread or shredded mozzarella cheese. (Pop quiz: What is your first clue that we have moved to Canada?)

foodsaver vacuum sealer_rickandkathy.com-2

  • It also has a marinade option. We haven’t tried that yet but friends claim it is a thing of beauty when you want to speed marinate chicken or beef.
  • It has a robust, durable housing, yet the trim vertical profile made it easy to find a spot for it in our cupboard.

foodsaver vacuum sealer_rickandkathy.com-1Finally (and this was, in truth, the deciding factor for us), it was on a killer sale at our local hardware store. While we knew we wanted a vacuum sealer, we sort of impulse purchased this one based on a “Look! There’s one on sale!” basis before doing our homework. Having said that, we’re very happy with our FoodSaver V3840.

BTW, if you happen to find Seal-A-Meal bags or rolls for less than the FoodSaver bags, we tried them (also on sale locally) and they worked fine.

As for the Seal-A-Meal vacuum food sealer itself, the Cook’s Country “Recommended with hesitation” review said, “It has no manual pulse mode, so it crunched pretzels and cereal into crumbs. That said, it kept frozen food ice-free just as long as models that cost four times its price, three months and counting.”


Seal-A-Meal Vacuum Food Sealer

And cost is indeed a factor here: at around $30, the Seal-A-Meal vacuum food sealer is the #1 Best Seller on Amazon.  Also, it is reported to work well with the less-expensive (at least on Amazon) FoodSaver rolls.

Ultimately, to answer the question “What is the best vacuum sealer?” the real-world answer should consider the combination of “best vacuum sealer reviews” with “best vacuum sealer bag price.” Here’s why:

Back in the pre-online banking era when people used to write paper checks, Rick had an interesting conversation with Intuit founder Scott Cook. Rick wanted to understand how Intuit was able to sell Quicken software for almost no money without upsetting shareholders. The insight he received was that Quicken customers would inevitably become buyers of Quicken checks and other paper products—consumables with high profit margins. There you have it: a high-tech redirect to a lucrative low-tech profit center.

Translated to the world of vacuum sealers, the best vacuum sealer is the one that performs well for your needs—and isn’t too expensive to feed with bags.

*On a completely corporate-facing note, Foodsaver is owned by a publicly-traded company, Jarden (NYSE: JAH) that acquired the Foodsaver brand in 2002 when it bought Tilia International, maker of the Tilia Vacuum Sealer. Jarden is a 33,000-employee, $7.7 billion company that also owns Kerr, Ball, and Bernardin of canning jar fame as well as Bicycle and Hoyle playing cards, First Alert smoke detectors, and Yankee Candle. Oh, and also Mr. Coffee, Oster, Sunbeam, Crock-Pot, Coleman, K2, Aerobed, Rawlings, and Marmot.

These people know a thing or two about food preservation and preparation, and survival equipment, including that ingenious wireless entertainment system known as “a deck of playing cards.”

And now you know.

More Kitchen Recommendations

knives-and-knife-sharperners-rickandkathy coffee-grinders-rickandkathy
best-bakeware-rickandkathycrockpots-and-slow-cookers-rickandkathy kitchen-gadgets-rickandkathy
 pots-and-pans-rickandkathyteflon-pans-rickandkathy

Coffee Grinders: Cooks Illustrated, Consumer Reports, Amazon Reviews

Our beloved Krups coffee grinder had died, and the sound of the beans smashing at light speed against the plastic prep bowl in our mini food processor would wake the dead, or at least our house guests on a different floor. Thus we found ourselves in the market for a new coffee grinder. Here’s the summary of my digging into what Cooks Illustrated, Consumer Reports product reviews, the Amazon reviewer community, and a handful of other online gurus had to say about the blessed bean and how best to grind ‘er.

Coffee grinders-5

(Generally Agreed Upon) Key Factors In Grinding Coffee Beans

  1. The time between grinding and consumption:
    Less exposure to oxygen = less degradation of flavor = good coffee
  2. The uniformity of the grind: 
    Even grind = better extraction = “Ahh… that’s lovely!” coffee.
  3. The heat created during grinding:
    Slower grinding = lower temperature increase =
    “Don’t speak. Just… don’t speak…” coffee
  4. A clean grinding mechanism:
    Leftover grinds in the machine =
    oxygenated, degrading coffee grounds in your next pot =
    “Fuggedaboudit. I’m going to Starbucks.”

Ergo, (Generally Agreed Upon) Key Factors in Evaluating Coffee Grinders

  1. Using even a cheap half-decent grinder at home just before you make your coffee trumps using the big ol’ supermarket monster grinder at the Piggly Wiggly the day before.
  2. The three different grinder mechanisms commonly available affect the uniformity of the grind. Burr grinders generally work better than blade grinders at creating an even grind and minimizing coffee “dust” that can clog a filter and create sludge in the bottom of your cup. Additionally, conical burr grinders do a better job than flat burr grinders as they usually operate at a lower speed, meaning they’re quiet and create less static (static = mess). Finally, no matter what kind of grinder you use, you should match the coarseness of the grind to the brewing method. (Note: as we depend on our grinder for everything from our French press (very coarse grind) to our espresso machine (very fine grind), we were looking for a well-rounded grinder that could handle both ends of the spectrum.)
  3. Heat creation: good quality burr grinders are reputed to create less heat during the grinding process than the blade jobbers.
  4. Ease of cleaning counts as the race against the clock is already lost if you wake up to yesterday’s leftovers in your grinder. And in my world, the easier something is to clean, the more likely it is that it will become the habit it should be.

Three Additional (Universally Agreed Upon) Key Factors in Evaluating Coffee Grinders

  1. Cost: Spending less money to achieve similar results is better.
  2. Reliability: A grinder that’s in a shipping container on its way back to the manufacturer for repair won’t make very good coffee, no matter how much you paid for it in the first place.
  3. Noise: It should be the aroma of the elixir, not the supersonic squeal of the grinder, that coaxes your beloved from their slumber.

With that background in mind, we visited our usual suspects–Cook’s and Consumer Reports–for their recommendations, only to learn that they were surprisingly tough to come by.

An online search of Cook’s Illustrated produced only one disappointing review on coffee grinders dating back to 2001 (the date is obviously problematic) and even that only reviewed grinders under $50.

Their highest recommendation back then is still available, the Capresso 501 Cool Grind blade grinder, above. A newer model is now available, except that now it’s called Capresso 501 Cool Grind Coffee/Spice Grinder.

Given the conventional wisdom that uniformity is a top consideration, why would their top recommendation be a blade grinder? In their article, Cook’s claims that their tests didn’t reveal a huge difference in temperature between the blade models and the few low-end burr grinders they tested, and that by giving a blade grinder a good shake as it’s grinding, the uniformity issue of the grind can be resolved, so maybe an inexpensive blade grinder is indeed an okay option for an average coffee drinker.

And at around $20, the Capresso 501 certainly qualifies as a winner in the price category, but with only a 3.7 star rating and 12 reviewers on Amazon.com, it’s an underwhelming consideration.

Ironically, it was Cook’s next highest recommendation from 2001 that has emerged as the WILDLY popular #1 Best Seller in “coffee grinders,” on Amazon, the Krups F20342 blade grinder (above).  Also available at around $20, the Krups has (at the time of writing) a whopping 4.4 star rating with 2836 reviews! (I also accidentally found myself looking at the #1 Best Seller cheap meat grinder that’s also a pasta maker, but that’s a different story for another day.)

So if you just want a decent, reasonably reliable home grinder, according to a 13-year old review by Cooks Illustrated and around 3000 informed consumers, you get a lot of bang for your buzz with the Krups. Just be sure to pick it up and make like a martini master to even out the grind, and you’ll be 4.4 / 5.0 the way to a great cup of coffee.

Incidentally, Consumer Reports’ more recent review talks about exactly one model that grinds coffee, and it isn’t even an actual stand-alone coffee grinder. What part of the brave new world vision of “a Starbucks on every corner” have these people missed?


Krups Grind and Brew Coffee Machine

It’s a kinda pretty coffee machine that both grinds and brews with a conical burr grinder, and while you’d expect a decent machine based on both the brand name and type of grinder, it scores somewhere in the “blech” range by both Consumer Reports and the reviewers at Amazon. (No mention of this particular machine anywhere I could find by Cooks Illustrated.)
The biggest beef at Amazon about the Krups was, hands down, around reliability, and at roughly $150, I’d keep shopping, which we did.

Given the disappointing results of our Cooks and Consumer Reports recommendations and the wee epiphany that perhaps current users of coffee grinders might have insight into something Cook’s Illustrated and Consumer Report’s have lost interest in, we decided to try a new approach to find the best conical burr grinder out there: the Amazon reviewer community.

Yup. We crowd-reviewed our way into our new grinder.


And that’s how we landed on the the Capresso 560 conical burr grinder (above). At the time of this writing, at 2,114 customer reviews and a 4.1 star rating on Amazon.com, the Capresso had–by far–the strongest track record of any product that was returned with the search term “conical burr grinder.”
Coffee grinders-1
So far, we’re 98% loving it.
At about $100, it’s less expensive than the Baratza Encore, although the Barazta is also a well recommended unit that’s mentioned in several online guru discussions and was a strong runner-up consideration for us.

Coffee grinders-6It’s compact, solid with no flimsy-feeling parts, and runs virtually static free. I just tap it lightly after grinding (an old habit that was reinforced in my research), and the grinds transfer smoothly from the grinds holder to the French press with zero airborne grindlets cluttering the counter.

Coffee grinders-4It produces a beautiful even grind…

Coffee grinders-3… and it’s easy to take out the upper burr to clean. You just whip the little brush around the upper burr to loosen any clinging remnants, hold the base upside down over the sink and tap gently to dump any grounds around the bottom burr, and you’re done.

The unit has a wide range of grinding options, although so far, we’ve only tried the coarse grind for use with our French press, which incidentally is the top methodology recommendation by Cooks Illustrated on how to make good coffee.

Once we’ve fired up the espresso machine, I’ll weigh in on the remaining 2% of “loving it,” and I’ll be sure to check in in about 6 months to let you know if we 4.1 / 5.0 agree with the other 2,114.

More Kitchen Recommendations

knives-and-knife-sharperners-rickandkathy coffee-grinders-rickandkathy
best-bakeware-rickandkathycrockpots-and-slow-cookers-rickandkathy kitchen-gadgets-rickandkathy
 pots-and-pans-rickandkathyteflon-pans-rickandkathy

Toasters: Cooks Illustrated vs. Consumer Reports (vs. The Queen)

(Nov. 2017) UPDATED:

We are still LOVING our Magimix. It’s proven to be completely reliable, easy to clean, and since one of the best features is the “toast from frozen” function, we thought you might be interested in this recent article on The Secret to Good Toast. BTW, this Hamilton Beach is now the top seller on Amazon.

Here’s to toast!


How strongly do people feel about a good piece of toast?

Best Toaster: Cooks Illustrated v. Consumer Reports | rickandkathy.com

When my mom’s old toaster started to misbehave, this normally very easily pleased woman declared she wanted to replace it with the best toaster money could buy. She wanted same model as that used by the Queen of England, Herself. (For the royalty junkies among you, this is rumored to be the Dualit 2-Slice Toaster.)

Local shopping access ruled the day (my folks are not big Amazon users), and she ended up with a KRUPS 2-Slice Toaster instead, but the point of my story is this: if bread is the staff of life, buying the right toaster to carmelize your daily dose is a non-trivial affair.

That’s why, when our own toaster unceremoniously gave up the ghost, we consulted not one but two culinary oracles for their excellent toaster reviews: Cook’s Illustrated and Consumer Reports. Both provided excellent information, and for our search for the best toaster, the cross-referencing of both perspectives proved to be most enlightening.

Toaster-8

Mmmmm…. toast. (I’m just showing you this to keep you emotionally focused on the subject at hand. There is some actual information and helpful links coming, and I don’t want you to drift on me.) Beyond the usual considerations of price, reliability, ease of use, versatility, etc., there is apparently a LOT that goes into consistently producing an evenly browned hunk o’ bread, and most of it has to do with the heating elements: what they’re made of, how many there are, and where they’re placed. Nichrome wires are commonly used, and according to Cook’s, using more of them, evenly spaced, is a key success factor. The other heating element material sometimes used is quartz, and that turned out to be what is used in their top recommendation (and our new toaster!), the Magimix Colored Vision Toaster.

Toaster-1

I’m just glad that the Cook’s top pick didn’t use platinum for its heating elements, ’cause given what we were willing to pay for a really good toaster, I’m pretty sure we’d have coughed up whatever they asked. Apparently I have inherited the “good toast is not an extravagance: it’s a British Commonwealth birthright” gene.

Toaster-5

Consumer Reports also included the Magimix toaster in their top three, right behind their top choice, the Calphalon 2 Slot Stainless Steel Toaster, and their second choice, the Cuisinart CPT-420 Touch to Toast Leverless 2-Slice Toaster

In fourth place but ranked as their “Best Buy,” Consumer Reports toasters listed the Hamilton Beach 2-Slice Toaster.

At around $25, this really is a good buy, and as of this writing, it’s the #1 best seller toaster on Amazon. However, for our toaster money–and admittedly, the Magimix commands a fair whack of it–we wanted the Rolls Royce. For something that lives 24/7 on our countertop, we wanted a FINE looking piece of industrial design that would last at least until the 2034 Cook’s and Consumer’s recommendations come out. Plus, I’m a sucker for anything red in my kitchen.

Toaster-6

It’s easy to decode the five simple option buttons (even after you’ve gone through an international move and lost track of the manual): you can choose how dark you want your toast, toast bread or bagels, reheat previously toasted toast, toast frozen bread, or stop toasting if you see your toast is, um, toast. I’d like to raise a toast to the English language: Prost! (It rhymes with “toast.”)

Toaster-7

And speaking of Anglo-ish things, want to know what came in as Cook Illustrated’s second place toaster recommendation, “… with reservations?”

The Dualit 2-Slice Toaster. Ha! Sorry, Ma’am.

More Kitchen Recommendations

knives-and-knife-sharperners-rickandkathy coffee-grinders-rickandkathy
best-bakeware-rickandkathycrockpots-and-slow-cookers-rickandkathy kitchen-gadgets-rickandkathy
 pots-and-pans-rickandkathyteflon-pans-rickandkathy

Food Processor vs Blender

For years we’ve noodled on this question: If we have a great blender and an excellent set of knives (which we do), do we really need a food processor? And if so, which ones do Cooks Illustrated, Consumer Reports, and the gang at Amazon.com suggest we make room for in our kitchen?

godzillaTo get to the bottom of the question of food processor vs blender, we once again turned to our go-to source for all things kitchenly, Cooks Illustrated. I figured if Cook’s reviewed each type of machine separately, their test criteria would reveal good clues about which machine was best for what task.

I love being right.

Food Processors: Think “Prep, Pizza, Pastry, and… Pink?”

In a review updated just this month, Cook’s tested food processors for their ability to zip through three essential kitchen tasks: functions it might take you half a day to do with a knife, mixing dough, and emulsifying small quantities of liquidy stuff, and that’s a pretty good tip-off for what you should expect a food processor to do for you.

Specifically, in addition to being easy to clean, the machines were tested for:

  • Grating and slicing without squished or wasted food
  • Chopping celery, carrots and onions, and mincing herbs
  • Grinding nuts into uniform pieces
  • Cutting cold butter neatly into flour for pies (and anything else you might need to cut cold butter into, which turns out to be quite a lot)
  • Mixing pizza dough
  • Emulsifying the ingredients for a classic mayo

In their 2010 equipment review on food processors, Cook’s had rated the KitchenAid KFP750 as “still the one to beat” but this recent update lists it as now discontinued and thus out of their running.

Just out of curiosity, I checked on Amazon and there is still the “Cook for the Cure” Komen Foundation pink edition of the the KFP750 available.

Ummm… I just… ummm… oh, dear.

Well, as of this writing, it’s there if you want it.

Cook’s current second runner up, the Breville Sous Chef Food Processor (above) would have been their first pick, except for the price tag: it’s almost double that of their highest recommendation, the Cuisinart DFP-14BCN 14-Cup Food Processor below.

In fact, that’s the order Consumer Reports placed them in: the Breville is #1 and the Cuisinart ranked #3, separated by another Cuisinart model not mentioned at all by Cook’s, the Cuisinart DLC-2011CHB Prep 11 Plus. (Consumer Reports did not factor cost in their overall score, focusing instead on performance, noise, and convenience.)

In any case, given the neck and neck ranking race between the Breville and the Cuisinart, for the extra $200, we figured we could buy a lot of cabbage PLUS this beauty, which we did.


Cuisinart DFP-14BCN 14-Cup Food Processor

Amazon reviewers agreed with a 4.4 star rating and over 500 reviews.

Two words sum up our feelings on the Cuisinart: LOVE IT! Long-term readers of our blog will know we make a lot of food–soups, stir-frys, pizzas–based on sliced, chopped, or diced fresh vegetables and/or grated cheese. The Cuisinart has drastically reduced our prep time for these dishes, but it still wasn’t clear to us: which was the best machine for which task?

In the past, we had tried to use our Vitamix 5200 for several of these slicing, chopping and dicing tasks, but since blenders tend to want to puree everything into something either slurpable, drinkable or dippable, we gave up and went back to knives and box graters, until we made room in the tent for our new darling.

By following the directions in the short (and delightfully kitchy) instructional DVD that came with it, we now create perfectly sliced mushrooms and tomatoes, grated cheese, diced celery, etc. in the time it used to take us to pull up a stool and pour a glass of wine to sustain us through the job of doing it all by hand.

Zip… et voila! C’est finis!

cuisinart-1The one task that food processors in general don’t do well is emulsifying or liquifying large quantities. This isn’t because they aren’t up to the emulsification–is that a word?–itself.

I suspect this is in part where the “blender vs food processor?” confusion comes in as they can both do the job. It’s because the food processor container isn’t designed to accommodate that much liquid, and if you push the boundaries, you can end up with one helluva splashy mess on your hands. (Note the tiny “max liquid fill” line on the container in the image above.)

Blenders: Think “Beverages”

In addition to testing for durability, speed, and noise, Cook’s tested the blenders mainly on their ability to pulverize, puree, or liquify whatever was thrown in them. And the winner in the category of best blender is…


Vitamix 5200

We have owned one for years, and again, LOVE OUR VITAMIX. In addition to being an absolute work horse for making our morning smoothies and pureeing soups, it can slush up a mean margarita. But it’s not the only Cook’s approved option.

This, ladies and gentlemen, is the Breville The Hemisphere Control Blender..

Aside from the funky name, Cook’s give this their “best buy” rating, and at about half the cost of the Vitamix, 582 reviewers on Amazon.com agree on a 4.2 star rating. But neither the Vitamix nor the Breville win the race at either Consumer Reports or on Amazon’s best seller list in the category: that honor goes to this puppy:

The Ninja Master Prep Professional (QB1004) is ridiculously inexpensive, it performs beautifully, and unless you’re looking for a power workhorse that can make soup and/or chew gravel, almost 2000 reviewers on Amazon agree in 4.4 alignment that it’s a solid bet.

However, on occasion, we at rickandkathy DO want a blender that can make soup and/or chew gravel. Plus, we are Vitamix groupies. (What can we say?!)

The Vitamix also comes with a “dry” container that can, in theory, chop nuts, breadcrumbs, etc., but our experience is that it’s difficult to get a uniform consistency that’s fine enough without accidentally pulverizing stuff into meal. Our new Cuisinart food processor is a much better option for those tasks.

And while the Vitamix can mash together a good smooth hummus (in fact, that was one of Cook’s tests), we have found we prefer the slightly more rustic (read “chunky”) mouth feel we can get with the pulse lever on the Cuisinart.

The hummus example above is one of the crossover possibilities between food processors and blenders and is no doubt another source of the confusion between the two machines. However, for our money (literally), there is more than enough differentiation between the sweet spots of each to warrant making room on the shelf for both.


Two additional pluses to owning a food processor that we didn’t see coming : 1) no more weepy onion eyes, and 2) the ability to cut cold butter into other ingredients means that there are now recipes open to us that we simply couldn’t make any other way: see the recipe for “Creamy Milk Chocolate Frosting” below from our Cook’s Baking Illustrated.

Creamy Milk Chocolate Frosting

Adapted from Cook’s Illustrated “Baking Illustrated
Makes enough for a 9X13 sheet cake with 1/4 inch frosting. Give it an hour or so to cool before using.

INGREDIENTS

  • 1/2 cup heavy cream
  • pinch table salt
  • 1 tablespoon light or dark corn syrup
  • 10 ounces milk chocolate
  • 1/2 cup confectioners’ sugar
  • 1/4 c. cold unsalted butter, cut into 8 pieces

INSTRUCTIONS

  1. Heat the cream, salt, and corn syrup in microwave-safe measuring cup on high until simmering, about 1 minute, or bring to simmer in small saucepan over medium heat.
  2. Place chocolate in pieces in the work bowl of a food processor fitted with steel blade. Pulse until the chocolate is coarsely chopped.
  3. With the machine running, gradually add the hot cream mixture through the feed tube. Continue to process for one minute after the cream has been added.
  4. Stop the machine and add the confectioners’ sugar and process to combine, about 30 seconds.
  5. With the processor running, add the butter through the feed tube one piece at a time, and process until it’s all incorporated and smooth, about 20 seconds longer.
  6. Transfer your creamy and delicious frosting to a medium bowl and cool it at room temperature, stirring frequently until thick and spreadable, about 1 hour. Slather on to your cake, let it set, then serve with confidence: this frosting will make anything under it an outstanding success!

More Kitchen Recommendations

knives-and-knife-sharperners-rickandkathy coffee-grinders-rickandkathy
best-bakeware-rickandkathycrockpots-and-slow-cookers-rickandkathy kitchen-gadgets-rickandkathy
 pots-and-pans-rickandkathyteflon-pans-rickandkathy

Cooks Illustrated on How to Cook Kale Greens

After eating delicious servings of this anti-inflammatory superstar in restaurants and in the form of our homemade kale chips, we finally turned to the gurus at Cooks Illustrated to resolve the question of how to cook kale greens that you’d actually enjoy eating.

kale
Kale is described as an “assertive” green, and for good reason. It needs a firm hand during preparation to calm the bitterness and soften the chew into something your average dinner guest can motor through without incurring a TMJ injury.

Turns out, it’s not that tough. Ha! I love a good pun, don’t you? 

You just have to cook it like you mean it.

kale-3Once again, we turned to the infallible Cook’s Illustrated Perfect Vegetables for their kale tips and tricks. (And while we’re on the subject, those oven baked french fries on the cover are The. Best. Ever.)

The secret to fabulous kale (p. 141) turned out to be pretty simple: just blanch the leaves in boiling salted water for about 7 minutes before using in any quick cooking recipe. And even though this step seems to be adding work to the process, you actually avoid having to soak/clean the leaves in 2 or 3 changes of water before using them in the final dish. (With its curly leaves, kale is prone to hiding tiny bits of dirt in the corners. You don’t want this kind of “crunch” in your dinner.)

Blanching Kale

Bring about 2 quarts of water to boil in a dutch oven or large, deep sauté pan.

While you’re waiting for the water to boil, get the kale ready. Just pile three or four leaves into a stack, large on the bottom, smaller on the top. Fold the stack in half lengthwise so the central ribs line up and trim the ribs with one knife stroke. Turn the stack sideways and chop the leaves into 3-inch pieces.

kale-2Add 1 1/2 teaspoons of salt and your chopped kale to the boiling water, stirring until the leaves are wilted. Cover and cook about 7 minutes or until the greens are tender; drain in a colander.

Run your pot under cold water to rinse and cool it off, then refill with cold water. Plunge your now submissive greens into the chilly bath to halt the cooking process. Harvest your kale from the water and gently squeeze dry.

And that’s it! You’re now ready to use your kinder, gentler kale in your favorite recipes. What’s that you say? You don’t have a favorite kale recipe yet?

While there are several killer kale recipes in the the Perfect Vegetables cookbook (the “Assertive Greens with Shallots and Cream” rocks), here’s a super simple and lower fat “best kale recipe” to prime the pump, adapted from Cook’s Illustrated online recipe collection.

Kale With Black Olives and Lemon Zest

  • 1 1/2 teaspoons table salt
  • 2 pounds kale
  • 2 large cloves garlic, thinly sliced
  • 1/4 teaspoon red pepper flakes
  • 3 tablespoons olive oil
  • 1/3 cup pitted and chopped black olives (oil-cured or brined)
  • 1/2 cup chicken broth
  • 1/4 teaspoon lemon zest from 1 small lemon
  • Table salt
  • Lemon wedges

Prepare the kale per the instructions above.

In a large sauté pan, heat the garlic and pepper flakes with oil over medium heat until the garlic starts to sizzle. Add the olives and your blanched kale; sauté to coat evenly with the oil. Add 1/3 cup of broth, cover and cook over medium-high heat, adding more stock during cooking if necessary, until the kale is tender and juicy and most of stock has been absorbed, about 5 minutes. Stir in the lemon zest and serve with lemon wedges on the side.

Enjoy!

FYI, we’re excited to let you know that Rick’s “rickandkathy” cartoons are now available as greeting cards on FineArtAmerica.com, and what says “I love you” or “Happy Birthday!” better than a card featuring kale?

kale-notecard

Interested in more of our recommendations from Cooks Illustrated?

More Kitchen Recommendations

knives-and-knife-sharperners-rickandkathy coffee-grinders-rickandkathy
best-bakeware-rickandkathycrockpots-and-slow-cookers-rickandkathy kitchen-gadgets-rickandkathy
 pots-and-pans-rickandkathyteflon-pans-rickandkathy

Cooks Illustrated Best Kitchen Tools: Crock Pots and Slow Cookers

UPDATED 9/29/14:

In their newest review of slow cookers, Cook’s Illustrated introduces a new “digital 6-quart slow-cookers under $100” review that digs into some of the new technologies that are now available in slow cookers.  They tested a total of seven models, some of which include recent innovations such as self-stirring pots, combo units that go from the stove to the cooker base, internal temperature thermostat jobbers, and models that speed up or slow down cooking time so the meal is completed at a specific time.

Bottom line: the tried-and-true technology variables of even cooking and easier-to-use interfaces won the day with a new winner in the category: the KitchenAid 6-Quart Slow Cooker. The previous winner, the Crock Pot Touchscreen was bumped to a highly respectable second place, while the All Clad Slow Cooker with Ceramic Insert (once upon a time featured in second place in “no longer available online” review) wasn’t in the running at all due to its price coming in over $100.

The content below updates our original 1/5/14 blogpost to incorporate findings from the latest Cook’s Illustrated slow cooker review.


Best Slow Cookers

The “Highly Recommended” winner of the latest Cook’s Illustrated slow cooker review is a KitchenAid 6-Quart Slow Cooker that features four temperature settings, 24-hour programmability, and a 6-quart removable, oval-shaped ceramic vessel:


KitchenAid 6-Quart Slow Cooker

The winner of an earlier Cook’s review (and the second-place finisher in the current review) is the Crock-Pot Countdown Touchscreen Digital Slow Cooker, an oval-shaped slow cooker with 6-1/2-quart removable stoneware crock, touchscreen control panel, and programmable cooking time:


Crock-Pot Touchscreen

The Crock-Pot Touchscreen is easy to use (read: don’t need to be a computer scientist to work the control panel), features a glass lid so you can monitor wazzup, and a timer that goes to 20 hours, even on high.

Slow Cooker-1Too bad we hadn’t read the Cook’s review before we bought our All-Clad.

The All-Clad Slow Cooker with Ceramic Insert is in the increasingly rare “Slow Cookers Over $100” category. Even though this slow cooker is marketed as being a “26-hour max cycle programmable” model, it will only stay on the high setting for a max of 8 hours before switching to the warming mode.

That 8-hour maximum on the High setting has complicated the preparation of more than a few of our meals. I have, on several occasions, stumbled through the dark to re-boot a batch of our favorite fantastic 24-hour baked beans (recipe below) that needed LOTS of liquid and the high setting, fer instance.

Small Slow Cookers

Now this makes a lot of sense to me: a small slow cooker for smaller families or smaller kitchens. Of course, you are still looking for a model that is consistent, easy to use, good-looking, low maintenance, and cheerful first thing in the morning.


Cuisinart 4-Quart Cook Central 3-in-1 Multicooker

Voila! Meet the perfect contender in the newly emerging field of “multicookers”: slow cookers that can also brown, saute, and steam food. The Cuisinart Multicooker can accommodate about half the quantity of food of its larger brethren and also has… wait for it… a programmable timer that can cook on high for up to 24-hours before automatically switching over to “keep warm.” According to Cook’s, everything (brown/saute/steam) works according to plan with the benefit of being able to sear food before cooking or reduce sauces afterward without mucking up another pot.

Portable Crock Pots


Crock-Pot Lunch Crock Warmer

Okay, not sure why exactly we would give over cabinet space for a portable crock pot, unless all those Facebook postings about the evils of microwave ovens are true. However, if you find yourself in need of a little base and insert to carry and reheat food somewhere with electricity yet not your home or using a microwave oven, this Crock-Pot Lunch Crock Warmer is apparently the best portable crock pot on offer, recommended “with reservations.”

Pros: It works. The crock pot heats quickly to 140 degrees and after a couple of hours hits a max of about 175 degrees and stays there until you shut it off. You can also leave the base at the office and just schlep the 20-ounce insert back and forth from home.

Cons: Since the lid can leak after multiple heating/cooling cycles and trips through the dishwasher, Cook’s recommends putting the insert into a zip-lock bag for transport.

Best Slow Cooker Tips and Tricks

Here are five slow cooker tips and tricks to ensure that your slow cooker meals are as fantastic for your health and palate as they are for your time management resolutions.

  1. Fill your slow cooker to the right level to make sure you hit the timing in the recipe and to keep your food safe. Overfilling (over 2/3 full) can result in a slower-to-temp ramp, leaving your food (especially meat) in the dangerous “luke-warm” zone where bacteria are most comfortable and breed happily.
  2. Pick your weapon: use the correct size. Most slow cooker recipes are created with a 5-6 quart slow cooker in mind. The key is to make sure that the vessel is neither under- nor over-filled (see gross bacteria warning above).
  3. Use only thawed food and bring liquids to a simmer (microwave works great for this) before adding them to the pot to jump start the initial “heat up” process. Cut meat into pieces to make sure they don’t take too long (see icky bacteria insights above), or end up being undercooked entirely.
  4. Glass lids help avoid the temptation to lift the lid and peek, letting precious heat and moisture escape. Don’t peek!
  5. Invest in one of the new multicookers for maximizing flavor. There’s nothing like some toothsome carmelized bits from searing and sauteing right in the pan and then deglazing with whatever liquid you add, all without the added step (and mess) of using another pan, to amp the “wow” factor of your next easy-peasy culinary masterpiece.

For more slow cooker tips and tricks and for some KILLER slow cooker recipes, check out these top-rated slow cooker bibles from America’s Test Kitchen:


Slow Cooker Revolution

and the follow up volume:


Slow Cooker Revolution, The Easy Prep Edition

With recipes for everything from Chicken Soft Tacos to Poached Salmon and even Cheesecake, you may never pull out your frying pan again!

24-Hour Slow Cooker Vegetarian Boston Baked Beans

  • 1 pound dried navy, soaked overnight
  • 2 medium onions, grated
  • 1/3 cup molasses
  • 1/3 cup maple syrup
  • 1/4 cup ketchup
  • 1 14.5 oz. can of crushed tomatoes
  • 1.5 teaspoons smoked paprika
  • 1 tablespoon dry mustard
  • 1/4 to 1/2 teaspoon cayenne
  • 2 teaspoons tamari or soya sauce
  • 1/4 cup bourbon or rum
  • 2 tablespoons cider vinegar
  • 1 teaspoon salt
  • Freshly cracked pepper

After soaking the beans overnight, drain them, cover with fresh water, and bring to a boil for 5 minutes. Drain again. Whisk together all of the remaining ingredients and place in a slow cooker with the beans. Add water to amply cover the beans.

Cover and cook on high until the beans are very soft, at least 12 hours, although on occasion I’ve left ours for 24 hours and they were fabulous. IMPORTANT: Check periodically and add more water to keep the beans from drying out until they’re soft enough to squish between your tongue and roof of your mouth. You’ll look long an hard to find a recipe that produces richer, browner, and more flavorful baked beans!

Sources:
Small Cook’s Country: Small Slow Cookers, August 1, 2013
Cook’s Country: Slow Cookers, October 1, 2014
All-Clad
Crockpot

More Kitchen Recommendations

knives-and-knife-sharperners-rickandkathy coffee-grinders-rickandkathy
best-bakeware-rickandkathycrockpots-and-slow-cookers-rickandkathy kitchen-gadgets-rickandkathy
 pots-and-pans-rickandkathyteflon-pans-rickandkathy