Pesto is the magical synthesis of the Flavor of Green, the Curative Clean of Garlic, the Warmth of Nut, the Peace of Parmesan, and the Umami of Olive Oil.
Heaven.
A classic basil pesto recipe (per Cook’s Illustrated) involves pulsing until smooth the following ingredients in a food processor, and then stirring in 1/4 cup parmesan cheese:
1/4 cup pine nuts, walnuts, or almonds, previously toasted in a heavy skillet until golden and fragrant, 4-5 min
3 blanched medium garlic cloves (45 seconds in boiling water, rinse in cold, peel and mince)
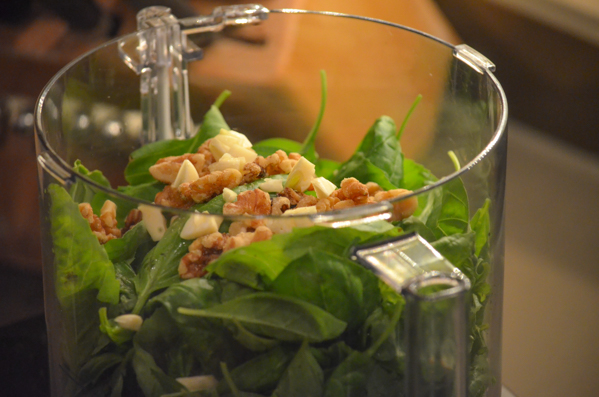
2 cups packed fresh basil leaves (“bruised” before use by pounding in a sealable plastic bag with a rolling pin)
2 tablespoons packed flat-leaf parsley leaves (optional for color)
7 tablespoons extra-virgin olive oil
1/2 tsp. salt
According to Cook’s Illustrated, blanching “tamed” the garlic while bludgeoning the basil boosted its herbaliciousness. Our version is way less precious, easier, and absolutely delicious, but then again, we like our garlic on the feisty side. Rick and Kathy’s Easy Basil Pesto Recipe
Add 1/2 c. high quality olive oil and 1/3 c. raw walnuts, 1/2 tsp. salt and fresh ground pepper. Pulse until mostly smooth.
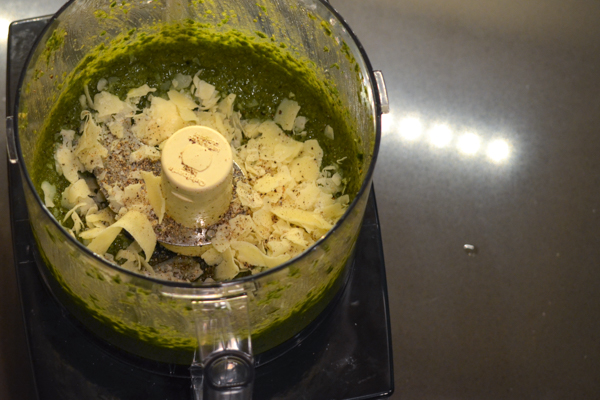
Add 1/2 c. parmesan cheese and pulse until blended. Adjust salt if necessary.
Oh, my.
Store in the fridge (up to 5 days, but it won’t last that long) with some plastic wrap pressed down so it makes contact with the surface to prevent excessive darkening.
As my basil was waning, I harvested it all this week and made several batches.
I took what I wanted to freeze and divided it into ice cube trays and covered tightly with plastic wrap before freezing for a couple of hours. I then took the frozen pesto cubes and used a vacuum sealer (our review here) to preserve as much color and flavor as possible, and popped them back into the freezer.
Vacuum-sealed fresh basil in February, baby. Oh yeah.
Try it in its classic incarnation as a pasta sauce, adding 1/4 c. of reserved hot pasta water to the pesto to loosen it up a bit and soften and blend the flavors before coating the drained pasta.
But it’s safe get out on the ledge a bit here, too.
Try it on everything from crackers to omelets—sublime when tucked in with spinach, parm cheese, and avocado—to salmon as a delicious crusty coating, layered on like icing before baking/broiling.
Last week I was struck with an overwhelming desire for fresh, homemade egg pasta because…
… basil.
Question: Is pasta bad for you? Answer: Hell, no!
Is it made fresh, with love, from four of the most basic kitchen staples and make you happy you’re alive?
Does it inspire you to consume armfulls of verdant summer herbs at their height of greenliness and a glass of a good Italian red?
Is it easy, cheap, delicious, and fun to make?
Well. There you go, then.
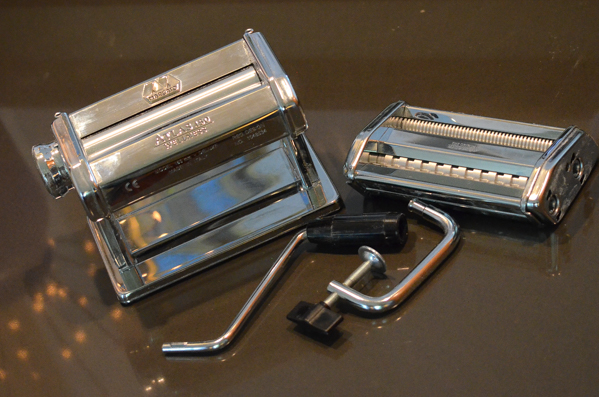
Even our Italian-made pasta machine knows that eaten in moderation, fresh pasta brings wellness into your life.
This is why it’s confusing to us that, to date, neither Cook’s Illustrated nor Consumer Reports has reviewed the humble manual pasta machine. (We’ll keep an eye out and let you know if either one ever weighs in with their “highly recommended” or “best buy.”)
When we wanted to buy one a couple of years ago, we were left to our own sleuthing and landed on the Amazon favorite, the Marcato Atlas Wellness 150 pasta maker.
Simple, safe, and satisfying to use, the Marcato pasta roller and cutter brings one thing to the game that a rolling pin and knife combo never will: consistency.
To qualify as comfort food, the noodles must be of a consistent thickness and width, bite after bite. There’s something about the hypnotic bliss of excellent pasta that demands an unvarying mouthfeel.
It’s why great restaurants care about evenly diced ingredients. Turns out, size really does matter.
And for the home kitchen chef in search of consistency, sometimes machines are just better. In the case of manual pasta makers, almost 1000 Amazon reviewers rated the Marcato Atlas a whopping 4.7 stars of approval.
If you’re more into the motorized kind of fun and have a KitchenAid stand mixer (and as a foodie’s kitchen “must have,” you should!), there are pasta attachments that fit the power hub on your machine. The crew at Amazon love theirs: another 4.7 star recipient here across more than 800 purchasers.
Cute, red, and vaguely reminiscent of Rosie, the maid on the Jetsons? You betcha!
But for our money and kitchen, we go with brains and performance before beauty. At a measly 3.4 star-rating on Amazon, the Weston just doesn’t measure up. Any product that scores a 1-star rating for 27% of the reviewers definitely falls into the category of “proceed with caution.”
Finally, for those among us who prefer homemade fresh pasta only if it’s coupled with almost zero engagement, experience, or kitchen mess, Williams-Sonoma has high praise for the electric pasta machine by Philips, their all-in-one pasta whiz, and guess what? 4.7 stars on Amazon too.
You put the weighed ingredients in the top, push the button, and… presto! Like magic, the machine kneads, rests, and starts extruding pot-ready perfect pasta.
While Rick and I can see that this approach has its appeal for many of our friends, we like to play with our food. And besides, we already have a no-mess pasta mixing and kneading machine to go along with our wellness maker:
Whether you go with hand cut, manual roller and cutter, or all new-fangled electric, if you’ve got one of these babies in your kitchen, you are just moments away from fresh egg pasta dough.
Watch how easy it is to make and cook pasta.
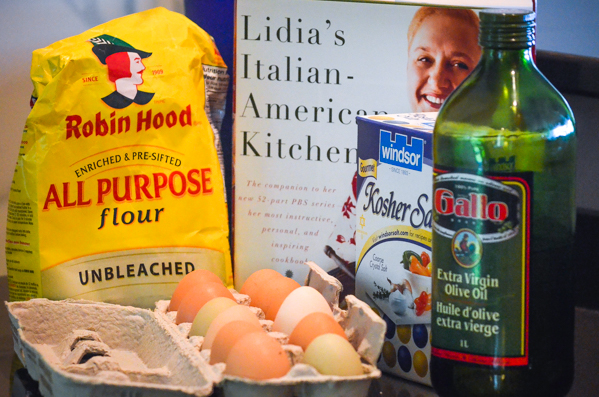
Lidia Bastianich, Queen of All Italian Cooking, lays out a helpful fresh pasta dough recipe on a per person basis: one egg per person, combined with between 1/2 and 2/3 cup flour (start with 1/2), 1/8 tsp. salt and 1/4 tsp. olive oil.
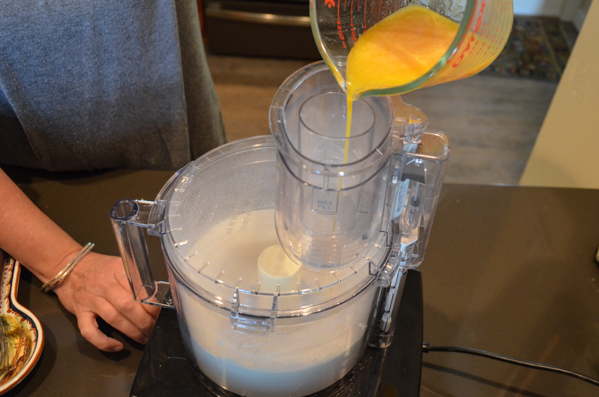
That means for Rick and me, we start with 2 eggs, 1/4 tsp. salt and 1/2 tsp oil. (If you’ve only got refrigerator temp eggs when you start, pop them into a bowl of warm tap water while you’re getting things set up to bring them closer to room temperature, but no biggie if they’re a bit on the cooler side.)
Put the flour in the Cuisinart with the metal blade, turn it on, then drizzle the egg/salt/oil mixture into the top.
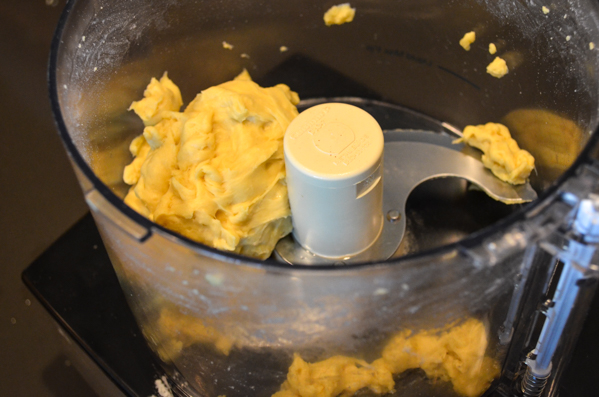
Run the Cuisinart until the dough forms into a rough ball, about 30-40 seconds. If the dough remains pebbly and refuses to collect into a ball, add just a dribble (seriously) of warm water, giving the processor a good chance to thoroughly incorporate the moisture before deciding it needs an additional dose.
If the dough is sticking to the work bowl, add more flour, 1 tbsp. at a time, until the dough looks something like ours above.
Don’t worry too much about over-processing the dough while you decide if the texture is right. It’s not that precious.
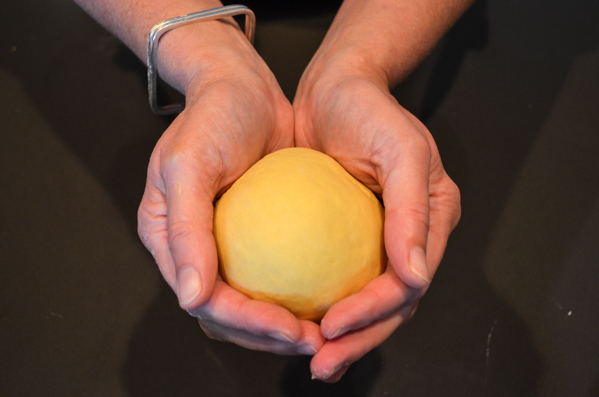
When you think you’re close, take the dough out of the processor and give it several good kneads with the heel of your hand, flipping and folding it on itself between pushes until you have a warm ball of silken wellness.
See why we prefer a little manual interaction with our pasta? Why should a machine have all the fun?!
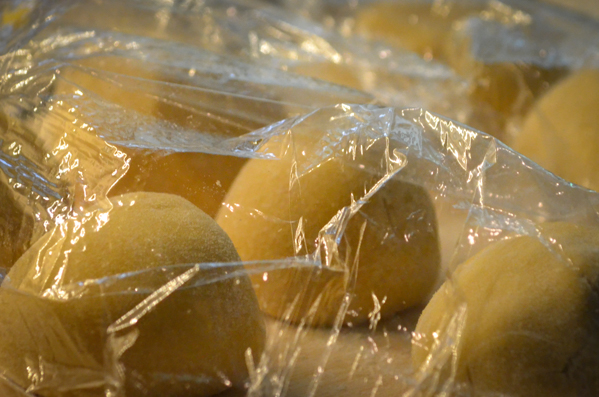
Give the gluten a time out to calm itself by fully encasing the dough with plastic wrap and letting it sit on the counter for an hour or so. (This will keep you from fighting in the rolling/cutting stage with what Lidia calls “nervous dough.”) It can also sit in a fridge for a day, but be sure to let it warm to room temp before proceeding to the next step.
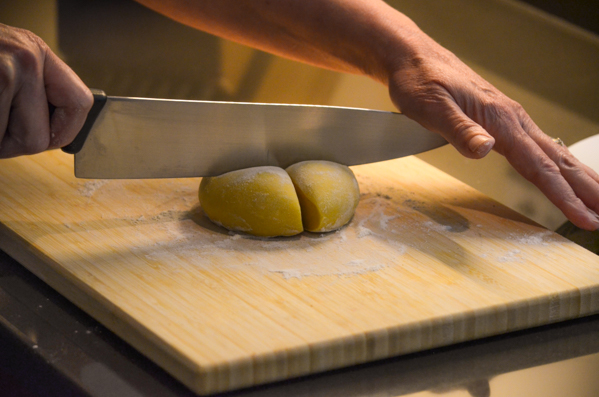
Cut and hand roll the dough into two smaller balls per egg used. In our case, we ended up making two separate batches, four eggs in total, so we had eight smaller balls waiting to be processed.
You’ll be working with one ball at a time, so keep the rest covered on a floured baking sheet while they wait their turn.
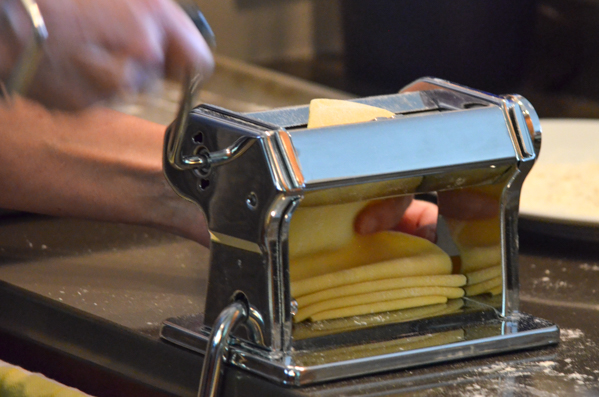
Flatten the ball into an oval patty, set the thickness regulator to three, and crank it through.
Fold it in half lengthwise and send ‘er through again.
Sprinkle both sides evenly with a little flour between rollings to keep the dough from sticking,
Change the setting to six, and roll again, or even a couple of times to get a consistent thickness across the whole sheet of dough.
We’ve tried settings of five, six, and seven, and for the flat noodle, six seems to work best. For spaghetti, you might want to go a little thicker and use a setting of five on the regulator.
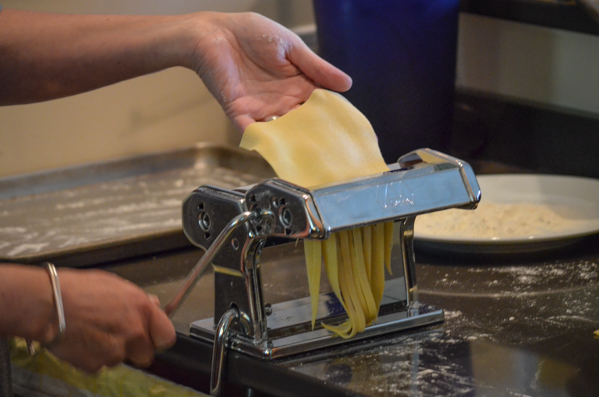
Attach the cutter device by sliding it into the brackets on the machine. Move the crank to the appropriate hole on the attachment, and feed in the rolled dough.
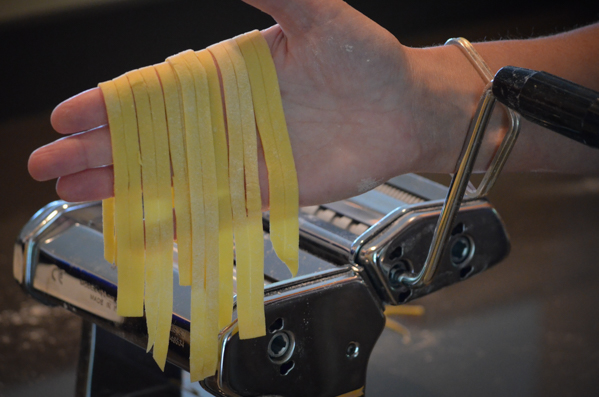
For ease of laying out the noodles to dry, it can be helpful (and fun!) to have a buddy on hand to neatly catch and hold flat the noodles as they emerge. Even if you’re on your own, you can switch cranking hands and catch them yourself, or simply let them fall into a nest and dry them that way. They will separate just fine either way as they cook.
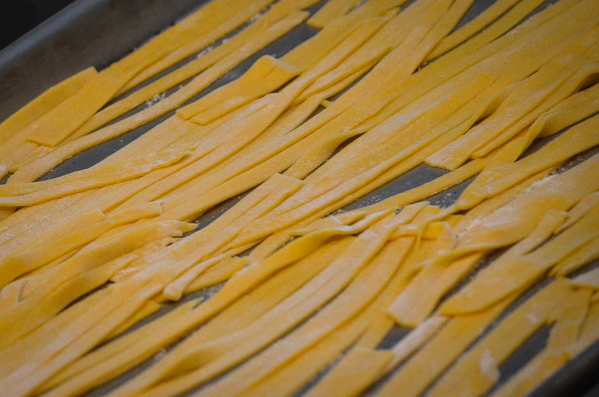
We laid the flat noodles we were planning to eat in a few hours on a floured baking sheet in a (mostly) single layer to dry.
For the spaghetti we were planning on eating later in the week, we took each batch as it emerged directly into the utility room and hung it on our freshly wiped laundry rack so it would dry completely before we stored it in ziplock bags.
If you’re into making more than one batch at a time, you might want to invest in a nifty foldable drying rack, but so far, we haven’t felt like pasta for dinner on laundry day, so we’re good.
Bring a good-sized pot of water to a boil, add a pinch of salt and a dash of olive oil, drop your noodles in, and cook uncovered, stirring gently a couple or three times.
For thinner, finer noodles, start testing (fish out a noodle and bite it) at 90-seconds. It’s okay if the pasta is still just a teensy bit firm as it will continue to absorb moisture and soften from the sauce.
For thicker noodles, cook two minutes and begin testing until you like the feel of it between your teeth.
Drain the noodles, reserving a few tablespoons of the water to add to the sauce to bring a beautiful gloss to the whole gig. Don’t rinse the noodles as it will prevent the sauce from adhering to them.
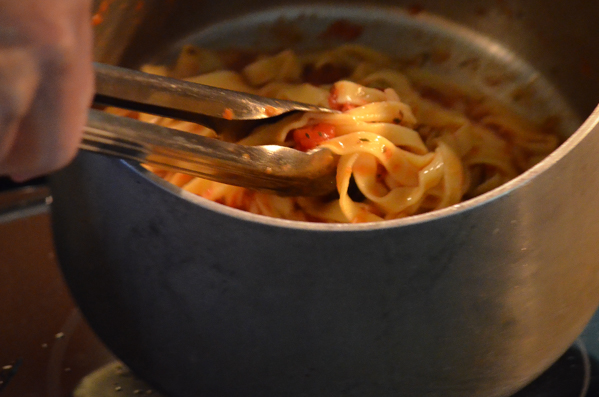
Return the hot noodles to the pot and gently fold in enough of your sauce to amply coat them.
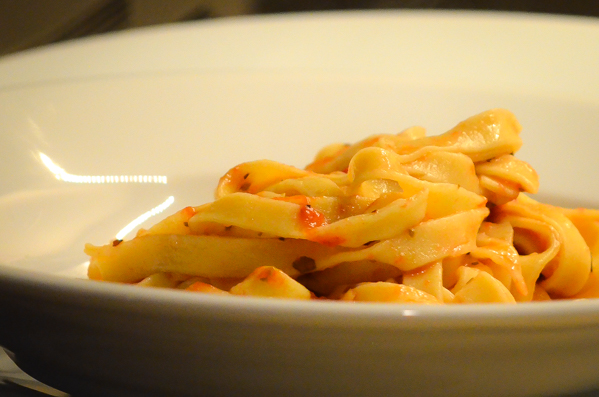
Using tongs, lift the noodles and twist them into a nest as you drop it into place to build a little height into the presentation.
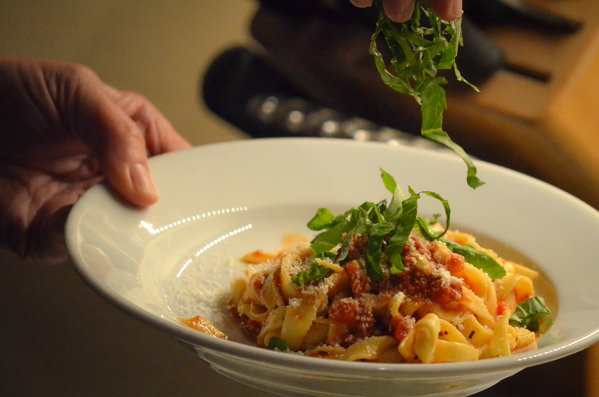
Top with a generous extra dollop of sauce and sprinkle with a little parmesan cheese if you’re so inclined.
Grab the camera and shoot like crazy while it’s still steaming, because it’s dinner time, and…
Our copy looks better than this. There are smears of egg-flour-and-water paste permanently lodged on Lidia’s beautiful Italian left cheekbone and chin, exactly as they would be in real life.
One of Rick’s more profound theories of life is this: “Things lead to things.”
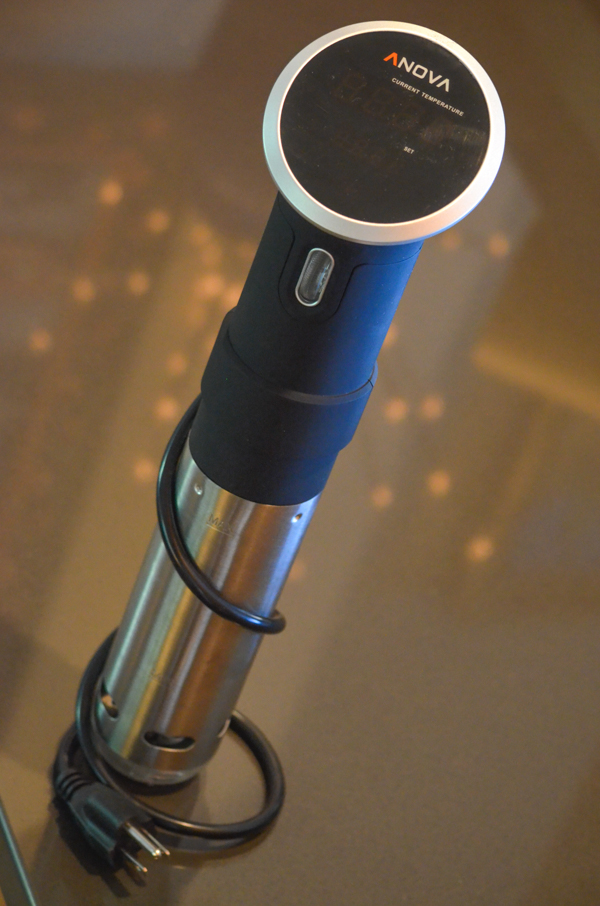
The fact that we now own the Cook’s Illustrated “highly recommended” sous vide machine, the Anova Precision Cooker, is a perfect example of Rick’s Theory of Thingage in action.
Here’s how it went down, this time:
We had recently moved near a Costco, started buying mozzarella cheese and fresh salmon in bulk, and found ourselves shelling out for a kitchen vacuum sealer.
Well, that’s just dandy! And here we thought we were just buying a vacuum sealer to portion and preserve 25-lb bags of coffee beans and raw almonds into household-of-two portions.
Um… remind me again what “sous vide” cooking is?
Sous vide—French for “under vacuum”—is a simple, fuss-free and time-tested way to slow cook food sealed in airtight plastic bags. It uses longer and lower temperatures than normal in a precisely temperature-controlled water bath that’s heated to the food’s desired final temperature.
Sous vide cooking gently locks in essential juices and amplifies flavor (and exquisite textures) while preserving vital water-soluble nutrients and improving food safety (no guessing!).
The method is used in everything from poached eggs (reportedly producing amazing yolk textures unattainable by any other means) to delicate fish to custards to chicken to vegetables and even tricky “easy to overcook/dry out” cuts of inexpensive meat such as flank steak.
Better food with less fuss? Sign us up.
We wanted a sous vide machine that, a) didn’t break the bank and, b) we could find room to store in our kitchen.
Both requirements were met by passing on the bulky and more expensive “water ovens” that have been the only options, until recently.
Instead, the answer lay in the more affordable, flexible, and storage-friendly stick “immersion circulator” styles, a conclusion that both Cook’s Illustrated and Good Housekeeping came to in their reviews and recommendations.
(Technically speaking, the December 2014 Cook’s Illustrated “highly recommended” winner was the “Anova One,” but good luck finding one! Per Anova.com., the Anova One has been discontinued and has been replaced by the Anova Precision Cooker. Cook’s has committed to testing this new Anova soon. Stay tuned: we’ll update as soon as their results are in. Meanwhile, we’re loving the new model.)
At a current 4.5 star rating with over 300 reviews, the Amazon community thinks highly of this option. And at a (relatively) modest price tag of ~$180 USD, the Anova Precision Immersion Circulator—and sous vide cooking in general—is now within reach of us mere mortals, as opposed to being the quiet little secret of high-end restaurant chefs.
Even-tempered, quiet, gentle, a quick clean, and low maintenance… the Anova would make a terrific roommate.
Good Housekeeping reviewed two different sous vide machines, the Sansaire and the Nomiku.
Good Housekeeping gave them both an enthusiastic thumbs up without expressing a preference between the two. Great! But, not that helpful if you just want to know what the best sous vide machine is.
Once again, the Cook’s review shed some light on things. They ranked the Sansaire as their second-placed “recommended” option, and here’s why:
It’s about the outport, the vent where the water is circulated back into the pot after a trip around the heating element. The Sansaire has a fixed outport, meaning you can’t adjust where the flow of water is aimed in the container. The Anova, on the other hand, has a rotatable outport, meaning if the water churn is too vigorous for delicate items, you can rotate it to deflect against the wall of the pot instead of directly into the water. This is, apparently, important if you don’t want your eggs to jostle audibly (and one presumes, in a manner threatening breakage) against the wall of the cooking container.
Albeit with roughly one third the number of reviewers, the review crew at Amazon rank the slightly more expensive Sansaire with a shade higher rating (4.6 stars) than the Anova. Why a higher ranking? This is not known at this time.
What is known is that no one reviewing the Sansaire complained about noisy eggs.
Cook’s Illustrated placed the Nomiku in their “recommended with reservations” spot, citing the squint-inducing “postage-stamp sized” display and narrower (and this is an important factor) water maximum-to-minimum range that meant more frequent monitoring and refills during a multi-day cooking task.
Amazonians were only so-so about the Nomiku, giving it 3.7 stars over ~180 reviews. Meh.
Enough about the machinery. Here’s how our first foray into Sous Vide Land went.
We decided to try our new Anova out on the inexpensive $8 eye-of-round roast that Rick cut into 2-inch thick steaks.
A healthy dose of salt and pepper on both sides—with our aromatic-of-choice, a sprig of fresh rosemary—as seasoning…
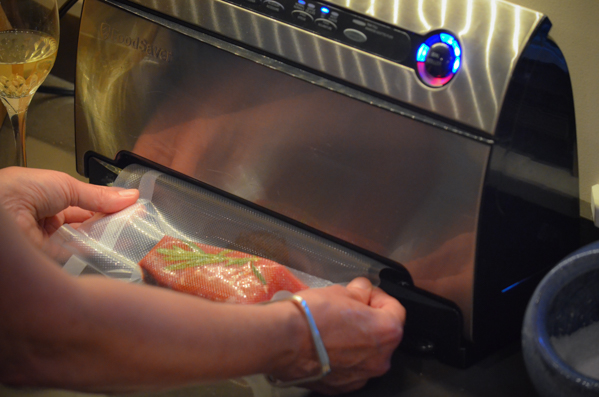
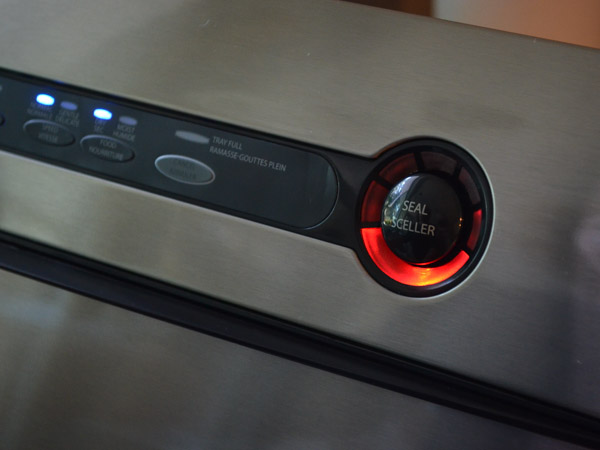
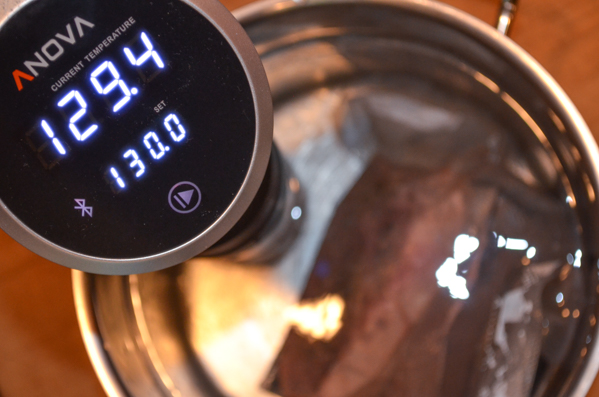
… a quick pit stop at our FoodSaver V3840 to seal in all the lean yet juicy loveliness, and into the tub they went for their 131° 24-hour water spa treatment. (More on time and temperature below.)
BTW, the Anova was super easy to use:
Clamp to stock pot or other suitable container
Fill with lukewarm-to-warmish (below the desired cooking temperature) water to somewhere between the “maximum” and “minimum” lines, depending on how big your bagged goodie is
Plug it in
For our North American buddies: hold down the “play” button for three seconds to switch between Celsius and Fahrenheit, or vice versa for the flipside
Dial the front wheely thing to the desired temperature
Hit “play”
Go away for anywhere from 20 minutes to 2 days, depending on what you’re cooking
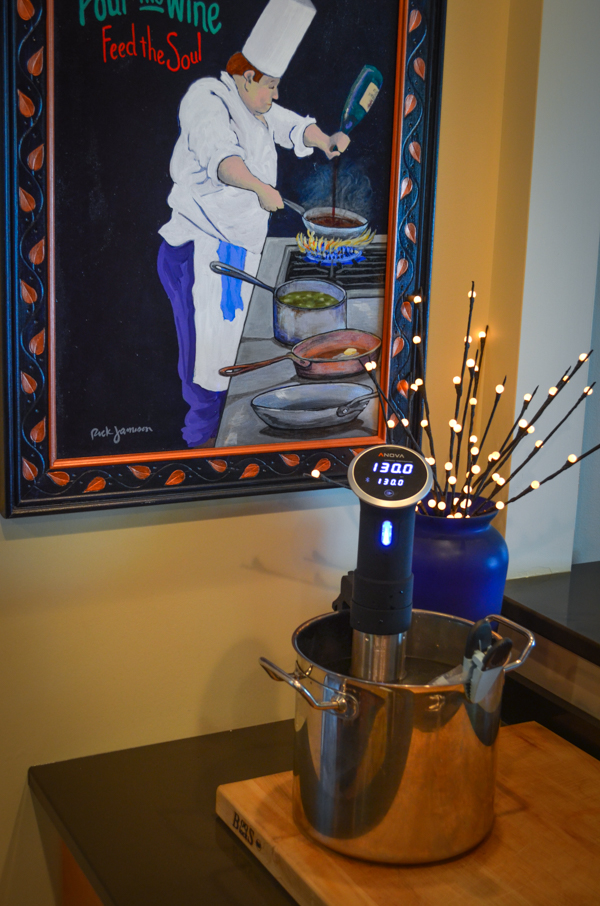
(In a complete aside: dontcha love the chef poster Rick painted?)
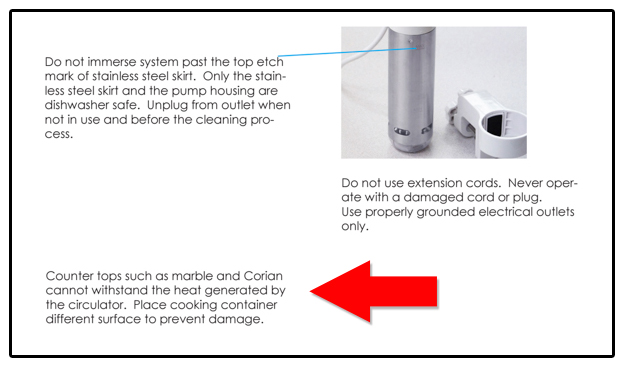
To make sure the bagged meat stayed totally submerged during the process, we clamped the bags in place, per a random online recommendation (probably from a Sansaire user). In hindsight, the circulation feature wasn’t torrential enough to make that 100% necessary, but hey… safety first.
Whoops! Luckily, we caught it in the first hour of operation. We whipped our immersion circulation-enhanced stock pot off our brand-new Cambria quartz countertop and on to our trusty, indestructible butcher block. No harm, no foul.
Right around the same time that we discovered the kitchen safety info, we also stumbled on a food safety recommendation, which said that the minimal temperature necessary to safely heat meat for the length of time we had planned is 131°F.
Rightio. Two clicks forward of the handy temp wheel, and there we were at 131°F for the next 23.5 hours.
About 14 hours into the process, we noticed that the water level had diminished slightly due to evaporation, so we topped it up a little and loosely tented a piece of aluminum foil at the top of our stock pot, but other than that, it was a completely hands-off gig.
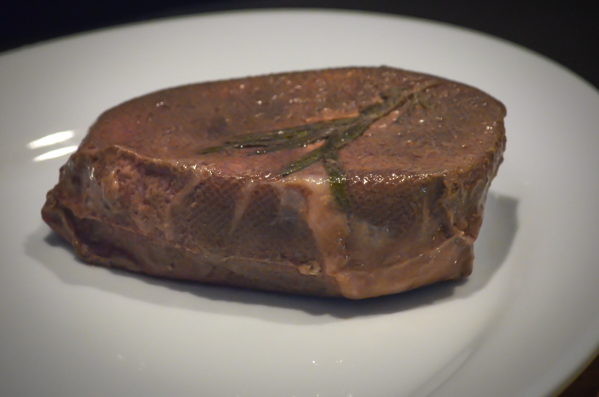
A full 24-hours later and this is what we removed from the bag: an inexpensive cut of beef cooked to a perfect medium.
However, as is the case for all sous vide meats, the external presentation needed a little touch up via a quick sear (think hot grill, hot pan, deep fry, etc.) to add that crispy, flavorful layer that every carnivore craves.
Apparently, there’s a fancy schmancy kitchen torch attachment that you clamp on to a standard propane cylinder torch that will make the searing even more excitingofficial effective, but we don’t have the fancy schmancy gizmo —yet—so Rick seared them briefly on both sides in a lightly-oiled saute pan. I meant to take a photo of the meat getting its quick sear, but somehow I got distracted and lost the moment.
Oh well.
I now have this exquisite photo of one of my favorite things: an upturned sleeve snugged firmly against the very cherished forearm of a lovely man cooking me a delicious dinner.
Ahh….
It was moist, flavorful, tender and perfect all the way through.
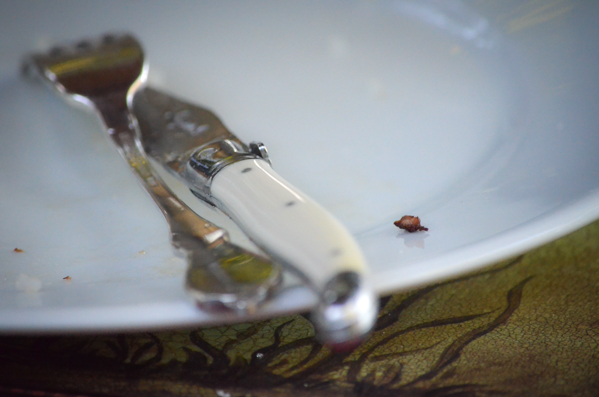
From Michael Pollan in “Food Rules” to gurus in Psychology Today, those in the know are saying that it’s a good idea to leave a little food on your plate at the end of a meal.
I don’t think this is what they meant, but I did force myself not to eat it anyway, just for the sake of personal discipline.
This is a well-rated and gorgeously produced volume by Thomas Keller, chef and author of The French Laundry CookbookandBouchon among others. According to the official Amazon.com review by Arthur Boehm:
The book makes no bones about being addressed to professionals. Typical recipes, like Marinated Toy Box Tomatoes with Compressed Cucumber-Red Onion Relish, Toasted Brioche, and Diane St. Claire Butter, involve multiple preparations and dernier cri ingredients, and thus resist home duplication.
Given we have no idea what “dernier cri” ingredients might be—”behind the scream”?—we don’t want ’em and are more interested in the simple, fuss-free aspects of sous vide cooking, so we’re leaving this one on the shelf at Amazon.
However, if you’ve got a coffee table book-loving, trend-conscious foodie on your Christmas list, go for it!
Published in 2014 (aka, newer) and available in paperback for around $20 (Kindle for $10), this more modest tome by passionate home cook, Jason Logsdon, gets high marks from reviewers looking for a solid primer with easy recipes.
Sous Vide Cooking Timing Chart
One of the first things we noticed about our new Anova Precision Cooker was, well, its precision. The temperature is calibrated to 0.1°, which instantly appealed to the geek in both of us as we imagined the prospect of producing perfect, predictable results with any food we cook.
But, as is the case for the rest of life, it’s always a bit more complicated than that.
Yes, the Anova Precision Cooker will keep a water bath at a precise temperature for a specific time period, but good luck finding a time/temperature chart that’s equally exact!
When searching the web for guidance on how long to cook our first dish (the 2″ thick eye of round steaks above) and at what temperature, we noticed right away that different “authoritative” sources don’t seem to agree on much of anything except how to cook root vegetables (183°F or so for 1-4 hours-ish):
How could the range be so wide, especially when sous vide enthusiasts tout the added safety benefits of the method? Not to mention our own experience, which is that we wouldn’t have wanted the steak any more well done than it was, and that was accomplished at a max temp of 131°F?
We discovered the explanation to the temperature/food safety riddle in this chart that shows the “Danger Zone” for harmful bacteria (salmonella and E. coli).
According to the chart, bacteria is killed instantly at 145°F. Given that the USDA is responsible for providing recommendations to everyone in the U.S. cooking everything by every method, this is logically where they must weigh in for meat.
However, the nasty bacteria will also be killed off eventually at temperatures above 130°F, given adequate sustained cooking time. It’s the combination of time and temperature that yields food that’s safe, for sure, to eat.
Sweet.
But what about the wide range of target sous vide cooking times and temperatures recommended by different sous vide authorities?
Our conclusion is that sous vide cooking is part art, part science, part personal preference in food “doneness,” and part learning how to partner effectively and safely with a new machine in your kitchen.
Bottom line: we’re just going to have to enjoy spending a bunch more time hanging out in our kitchen together as we figure out what works best, for us.
While Consumer Reports hasn’t weighed in on which is the best vacuum sealer (yet), Cook’s Illustrated and the reviewer community at Amazon are singing together nicely on the subject.
We ended up buying a vacuum sealer somewhere in the middle of the melody line: the FoodSaver V3840.
Have I mentioned that we recently moved to a new home that has both a Costco within a 10-minute drive AND a fish dock where local fishermen bring their catch almost daily? And that Rick has an extreme obsession a hearty enthusiasm for bargains, fresh food acquired as close to the source as possible, and provisioning our larder?
This new situation had us running both out of freezer space and into the risk of losing frozen fish due to freezer burn and/or expired “use by” dates. It was clearly time to either:
a) Buy a chest freezer (no room)
b) Stay out of Costco (ha!)
c) Eat fish every meal for the next six weeks straight (nope, no can do), or
d) Buy a vacuum sealer
Rightio!
Time to tune in to the home vacuum sealer rating game.
In the recent Cook’s Country—sister magazine of Cook’s Illustrated—review of vacuum sealers, the Weston Professional Advantage Vacuum Sealer (above) came out on top. While it doesn’t seem to have much traction at Amazon with only 3 ratings (4.7 out of 5) and 2 reviews, I suspect the just under $200 price tag is the driver there. Between Cook’s and the two reviewers on Amazon, though, this model gets a lotta love.
The Amazon reviewers were light on specifics in the midst of their gushing: “This is the best vacuum sealer and I have had others…” and “I love this after I learned how to use it. It’s working wonders. Love it.”
Cook’s was more specific:
“This compact, powerful heat-sealing model kept food fresh for three months and counting. Its intuitive interface has a responsive pulse mode and bright blue lights that indicate its progress. It works with a wide variety of bags, canisters, and rolls that were the cheapest of any sealer in our lineup.”
And thank you Cook’s for that last tidbit, because here we pause for a brief and entirely relevant tangent: you need to have vacuum sealer bags or customizable plastic rolls-waiting-to-be-turned-into-vacuum-sealer-bags for any of these models to work.
And while Weston (and Cook’s) claim that this model will work with a variety of bag brands (as long as they’re textured or embossed bags that are intended for use with vacuum sealers), several of the reviewers on Amazon vigorously claimed otherwise, specifically mentioning that Food Saver bags don’t work with the Weston. However, based on a cost comparison of current “list prices” on Amazon*, this shouldn’t be a problem since the Weston bags are less expensive anyway.
Cost Comparison: 11″ Vacuum Sealer Rolls
Brand
Product
Cost*
Cost / Foot
$25.96
(3) 16′ Rolls
54¢
$23.57
(3) 18′ Rolls
44¢
$12.99
(2) 9′ Rolls
72¢
Generic
$32.97
(2) 50′ Rolls
33¢
* Cost = Discounted prices @ Amazon.com as of 10/5/2014
A few tips on getting the most from your bags:
Cut the bags several inches longer than you need. Once you open them, you can then wash them out and re-use them.
Avoid the generic brands: the reviewers say they have a seriously low success rate at sealing, meaning you end up spending as much or more anyway with added work for your trouble.
For models without a “moist” setting, freeze wet foods before sealing to avoid getting moisture in the sealing zone. Moisture will prevent a solid seal.
While I’m not certain about the other brands, the FoodSaver brand bags are BPA free, microwavable, and because they’re suitable for simmering, perfect for the increasingly popular “sous vide” style of cooking. (UPDATED SEPT. 2015: Find out what sous vide machine Cook’s Illustrated now recommends, and which one we bought.)
Okay, so maybe it’s just me, but this looks so much like my blow dryer that it made me nervous: what if I got them mixed up?
Plus, the idea of me using a “handheld” powered vacuum in the same vicinity as a piece of slippery fresh fish conjured to mind the probability of a Chevy Chase-like kitchen scene that Rick would rather not have to clean up. I have no clue how you would use such a thing.
In fact, I had no clue how to use a non-handheld model either, until we got one and I found out how easy it is.
As you can tell from the video, in the end we bought a FoodSaver V3840. Serendipitously, it features everything that Cook’s liked about the other two FoodSaver models and avoided the bulk of the one and concern about durability of the other:
It automatically grabs, vacuums, and seals the bags.
It has a roll storage compartment with a built-in plastic slicer that tidily cuts bags to size.
It has both a normal and “gentle” vacuum setting, plus a manual override option that allows you to stop the vacuuming operation before it crushes more delicate or compressible items such as bread or shredded mozzarella cheese. (Pop quiz: What is your first clue that we have moved to Canada?)
It also has a marinade option. We haven’t tried that yet but friends claim it is a thing of beauty when you want to speed marinate chicken or beef.
It has a robust, durable housing, yet the trim vertical profile made it easy to find a spot for it in our cupboard.
Finally (and this was, in truth, the deciding factor for us), it was on a killer sale at our local hardware store. While we knew we wanted a vacuum sealer, we sort of impulse purchased this one based on a “Look! There’s one on sale!” basis before doing our homework. Having said that, we’re very happy with our FoodSaver V3840.
BTW, if you happen to find Seal-A-Meal bags or rolls for less than the FoodSaver bags, we tried them (also on sale locally) and they worked fine.
As for the Seal-A-Meal vacuum food sealer itself, the Cook’s Country “Recommended with hesitation” review said, “It has no manual pulse mode, so it crunched pretzels and cereal into crumbs. That said, it kept frozen food ice-free just as long as models that cost four times its price, three months and counting.”
And cost is indeed a factor here: at around $30, the Seal-A-Meal vacuum food sealer is the #1 Best Seller on Amazon. Also, it is reported to work well with the less-expensive (at least on Amazon) FoodSaver rolls.
Ultimately, to answer the question “What is the best vacuum sealer?” the real-world answer should consider the combination of “best vacuum sealer reviews” with “best vacuum sealer bag price.” Here’s why:
Back in the pre-online banking era when people used to write paper checks, Rick had an interesting conversation with Intuit founder Scott Cook. Rick wanted to understand how Intuit was able to sell Quicken software for almost no money without upsetting shareholders. The insight he received was that Quicken customers would inevitably become buyers of Quicken checks and other paper products—consumables with high profit margins. There you have it: a high-tech redirect to a lucrative low-tech profit center.
Translated to the world of vacuum sealers, the best vacuum sealer is the one that performs well for your needs—and isn’t too expensive to feed with bags.
*On a completely corporate-facing note, Foodsaver is owned by a publicly-traded company, Jarden (NYSE: JAH) that acquired the Foodsaver brand in 2002 when it bought Tilia International, maker of the Tilia Vacuum Sealer. Jarden is a 33,000-employee, $7.7 billion company that also owns Kerr, Ball, and Bernardin of canning jar fame as well as Bicycle and Hoyle playing cards, First Alert smoke detectors, and Yankee Candle. Oh, and also Mr. Coffee, Oster, Sunbeam, Crock-Pot, Coleman, K2, Aerobed, Rawlings, and Marmot.
These people know a thing or two about food preservation and preparation, and survival equipment, including that ingenious wireless entertainment system known as “a deck of playing cards.”
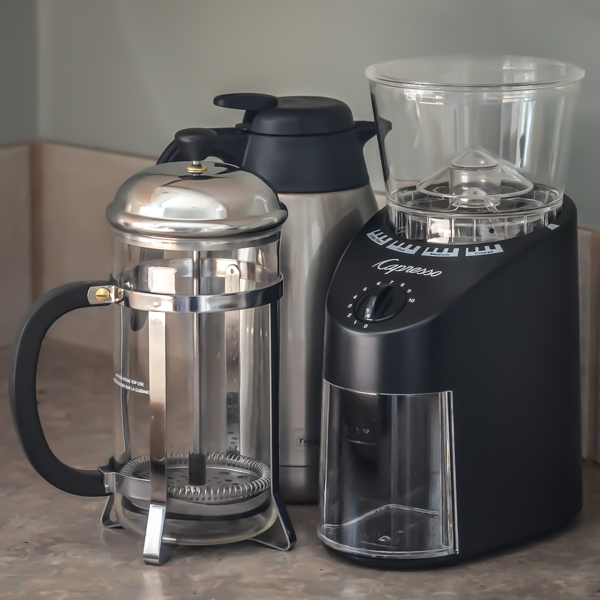
Our beloved Krups coffee grinder had died, and the sound of the beans smashing at light speed against the plastic prep bowl in our mini food processor would wake the dead, or at least our house guests on a different floor. Thus we found ourselves in the market for a new coffee grinder. Here’s the summary of my digging into what Cooks Illustrated, Consumer Reports product reviews, the Amazon reviewer community, and a handful of other online gurus had to say about the blessed bean and how best to grind ‘er.
(Generally Agreed Upon) Key Factors In Grinding Coffee Beans
The time between grinding and consumption:
Less exposure to oxygen = less degradation of flavor = good coffee
The uniformity of the grind:
Even grind = better extraction = “Ahh… that’s lovely!” coffee.
The heat created during grinding:
Slower grinding = lower temperature increase =
“Don’t speak. Just… don’t speak…” coffee
A clean grinding mechanism:
Leftover grinds in the machine =
oxygenated, degrading coffee grounds in your next pot =
“Fuggedaboudit. I’m going to Starbucks.”
Ergo, (Generally Agreed Upon) Key Factors in Evaluating Coffee Grinders
Using even a cheap half-decent grinder at home just before you make your coffee trumps using the big ol’ supermarket monster grinder at the Piggly Wiggly the day before.
The three different grinder mechanisms commonly available affect the uniformity of the grind. Burr grinders generally work better than blade grinders at creating an even grind and minimizing coffee “dust” that can clog a filter and create sludge in the bottom of your cup. Additionally, conical burr grinders do a better job than flat burr grinders as they usually operate at a lower speed, meaning they’re quiet and create less static (static = mess). Finally, no matter what kind of grinder you use, you should match the coarseness of the grind to the brewing method. (Note: as we depend on our grinder for everything from our French press (very coarse grind) to our espresso machine (very fine grind), we were looking for a well-rounded grinder that could handle both ends of the spectrum.)
Heat creation: good quality burr grinders are reputed to create less heat during the grinding process than the blade jobbers.
Ease of cleaning counts as the race against the clock is already lost if you wake up to yesterday’s leftovers in your grinder. And in my world, the easier something is to clean, the more likely it is that it will become the habit it should be.
Three Additional (Universally Agreed Upon) Key Factors in Evaluating Coffee Grinders
Cost: Spending less money to achieve similar results is better.
Reliability: A grinder that’s in a shipping container on its way back to the manufacturer for repair won’t make very good coffee, no matter how much you paid for it in the first place.
Noise: It should be the aroma of the elixir, not the supersonic squeal of the grinder, that coaxes your beloved from their slumber.
With that background in mind, we visited our usual suspects–Cook’s and Consumer Reports–for their recommendations, only to learn that they were surprisingly tough to come by.
An online search of Cook’s Illustrated produced only one disappointing review on coffee grinders dating back to 2001 (the date is obviously problematic) and even that only reviewed grinders under $50.
Given the conventional wisdom that uniformity is a top consideration, why would their top recommendation be a blade grinder? In their article, Cook’s claims that their tests didn’t reveal a huge difference in temperature between the blade models and the few low-end burr grinders they tested, and that by giving a blade grinder a good shake as it’s grinding, the uniformity issue of the grind can be resolved, so maybe an inexpensive blade grinder is indeed an okay option for an average coffee drinker.
And at around $20, the Capresso 501 certainly qualifies as a winner in the price category, but with only a 3.7 star rating and 12 reviewers on Amazon.com, it’s an underwhelming consideration.
Ironically, it was Cook’s next highest recommendation from 2001 that has emerged as the WILDLY popular #1 Best Seller in “coffee grinders,” on Amazon, the Krups F20342 blade grinder (above). Also available at around $20, the Krups has (at the time of writing) a whopping 4.4 star rating with 2836 reviews! (I also accidentally found myself looking at the #1 Best Seller cheap meat grinder that’s also a pasta maker, but that’s a different story for another day.)
So if you just want a decent, reasonably reliable home grinder, according to a 13-year old review by Cooks Illustrated and around 3000 informed consumers, you get a lot of bang for your buzz with the Krups. Just be sure to pick it up and make like a martini master to even out the grind, and you’ll be 4.4 / 5.0 the way to a great cup of coffee.
Incidentally, Consumer Reports’ more recent review talks about exactly one model that grinds coffee, and it isn’t even an actual stand-alone coffee grinder. What part of the brave new world vision of “a Starbucks on every corner” have these people missed?
It’s a kinda pretty coffee machine that both grinds and brews with a conical burr grinder, and while you’d expect a decent machine based on both the brand name and type of grinder, it scores somewhere in the “blech” range by both Consumer Reports and the reviewers at Amazon. (No mention of this particular machine anywhere I could find by Cooks Illustrated.)
The biggest beef at Amazon about the Krups was, hands down, around reliability, and at roughly $150, I’d keep shopping, which we did.
Given the disappointing results of our Cooks and Consumer Reports recommendations and the wee epiphany that perhaps current users of coffee grinders might have insight into something Cook’s Illustrated and Consumer Report’s have lost interest in, we decided to try a new approach to find the best conical burr grinder out there: the Amazon reviewer community.
Yup. We crowd-reviewed our way into our new grinder.
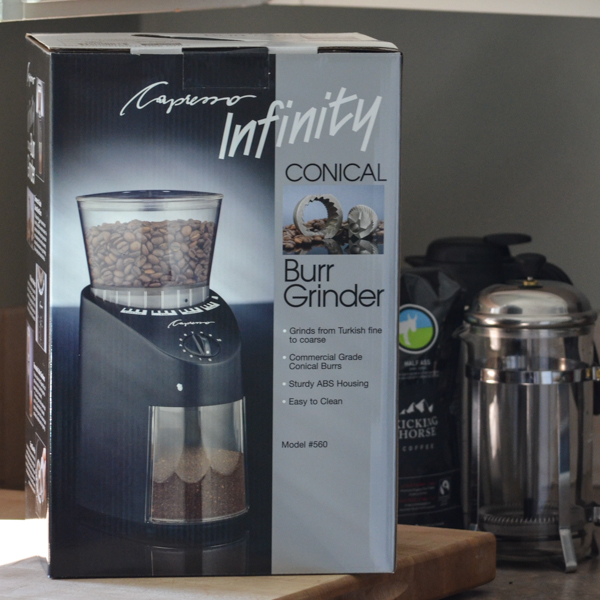
And that’s how we landed on the the Capresso 560 conical burr grinder (above). At the time of this writing, at 2,114 customer reviews and a 4.1 star rating on Amazon.com, the Capresso had–by far–the strongest track record of any product that was returned with the search term “conical burr grinder.”
So far, we’re 98% loving it.
At about $100, it’s less expensive than the Baratza Encore, although the Barazta is also a well recommended unit that’s mentioned in several online guru discussions and was a strong runner-up consideration for us.
It’s compact, solid with no flimsy-feeling parts, and runs virtually static free. I just tap it lightly after grinding (an old habit that was reinforced in my research), and the grinds transfer smoothly from the grinds holder to the French press with zero airborne grindlets cluttering the counter.
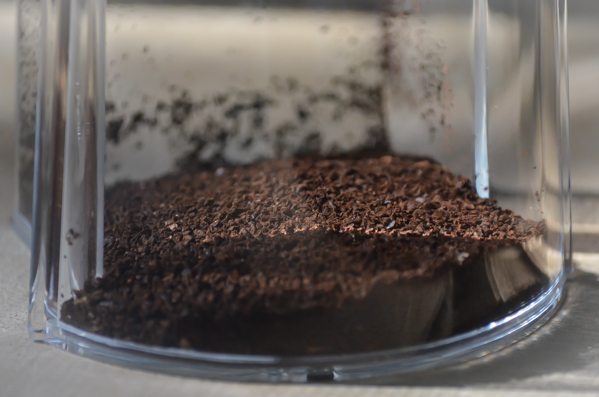
It produces a beautiful even grind…
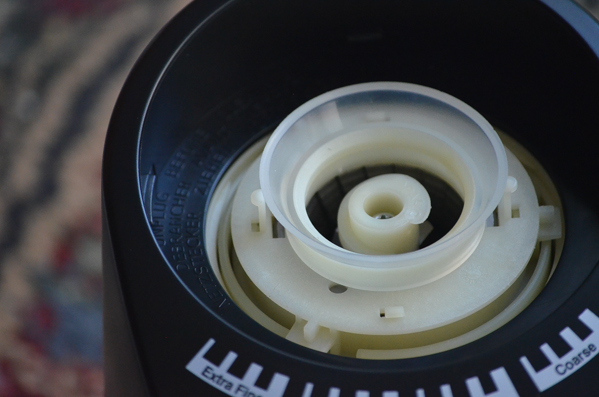
… and it’s easy to take out the upper burr to clean. You just whip the little brush around the upper burr to loosen any clinging remnants, hold the base upside down over the sink and tap gently to dump any grounds around the bottom burr, and you’re done.
The unit has a wide range of grinding options, although so far, we’ve only tried the coarse grind for use with our French press, which incidentally is the top methodology recommendation by Cooks Illustrated on how to make good coffee.
Once we’ve fired up the espresso machine, I’ll weigh in on the remaining 2% of “loving it,” and I’ll be sure to check in in about 6 months to let you know if we 4.1 / 5.0 agree with the other 2,114.
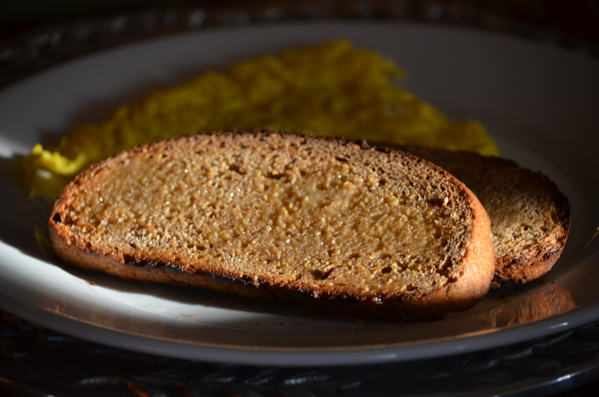
We are still LOVING our Magimix. It’s proven to be completely reliable, easy to clean, and since one of the best features is the “toast from frozen” function, we thought you might be interested in this recent article on The Secret to Good Toast. BTW, this Hamilton Beach is now the top seller on Amazon.
Here’s to toast!
How strongly do people feel about a good piece of toast?
When my mom’s old toaster started to misbehave, this normally very easily pleased woman declared she wanted to replace it with the best toaster money could buy. She wanted same model as that used by the Queen of England, Herself. (For the royalty junkies among you, this is rumored to be the Dualit 2-Slice Toaster.)
Local shopping access ruled the day (my folks are not big Amazon users), and she ended up with a KRUPS 2-Slice Toaster instead, but the point of my story is this: if bread is the staff of life, buying the right toaster to carmelize your daily dose is a non-trivial affair.
That’s why, when our own toaster unceremoniously gave up the ghost, we consulted not one but two culinary oracles for their excellent toaster reviews: Cook’s IllustratedandConsumer Reports. Both provided excellent information, and for our search for the best toaster, the cross-referencing of both perspectives proved to be most enlightening.
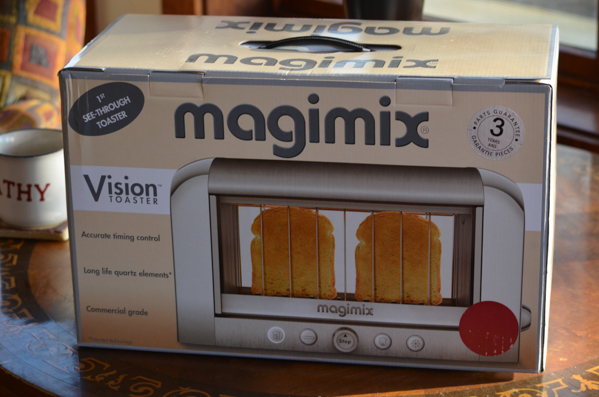
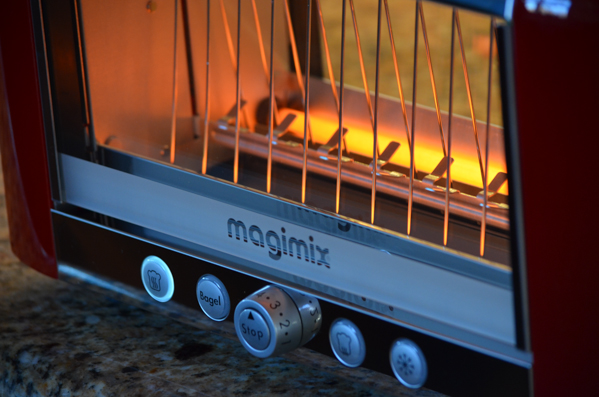
Mmmmm…. toast. (I’m just showing you this to keep you emotionally focused on the subject at hand. There is some actual information and helpful links coming, and I don’t want you to drift on me.) Beyond the usual considerations of price, reliability, ease of use, versatility, etc., there is apparently a LOT that goes into consistently producing an evenly browned hunk o’ bread, and most of it has to do with the heating elements: what they’re made of, how many there are, and where they’re placed. Nichrome wires are commonly used, and according to Cook’s, using more of them, evenly spaced, is a key success factor. The other heating element material sometimes used is quartz, and that turned out to be what is used in their top recommendation (and our new toaster!), the Magimix Colored Vision Toaster.
I’m just glad that the Cook’s top pick didn’t use platinum for its heating elements, ’cause given what we were willing to pay for a really good toaster, I’m pretty sure we’d have coughed up whatever they asked. Apparently I have inherited the “good toast is not an extravagance: it’s a British Commonwealth birthright” gene.
At around $25, this really is a good buy, and as of this writing, it’s the #1 best seller toaster on Amazon. However, for our toaster money–and admittedly, the Magimix commands a fair whack of it–we wanted the Rolls Royce. For something that lives 24/7 on our countertop, we wanted a FINE looking piece of industrial design that would last at least until the 2034 Cook’s and Consumer’s recommendations come out. Plus, I’m a sucker for anything red in my kitchen.
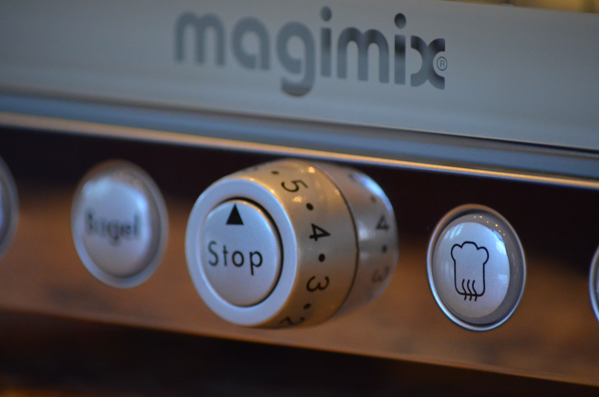
It’s easy to decode the five simple option buttons (even after you’ve gone through an international move and lost track of the manual): you can choose how dark you want your toast, toast bread or bagels, reheat previously toasted toast, toast frozen bread, or stop toasting if you see your toast is, um, toast. I’d like to raise a toast to the English language: Prost! (It rhymes with “toast.”)
And speaking of Anglo-ish things, want to know what came in as Cook Illustrated’s second place toaster recommendation, “… with reservations?”
For years we’ve noodled on this question: If we have a great blender and an excellent set of knives (which we do), do we really need a food processor? And if so, which ones do Cooks Illustrated, Consumer Reports, and the gang at Amazon.com suggest we make room for in our kitchen?
To get to the bottom of the question of food processor vs blender, we once again turned to our go-to source for all things kitchenly, Cooks Illustrated. I figured if Cook’s reviewed each type of machine separately, their test criteria would reveal good clues about which machine was best for what task.
In a review updated just this month, Cook’s tested food processors for their ability to zip through three essential kitchen tasks: functions it might take you half a day to do with a knife, mixing dough, and emulsifying small quantities of liquidy stuff, and that’s a pretty good tip-off for what you should expect a food processor to do for you.
Specifically, in addition to being easy to clean, the machines were tested for:
Grating and slicing without squished or wasted food
Chopping celery, carrots and onions, and mincing herbs
Grinding nuts into uniform pieces
Cutting cold butter neatly into flour for pies (and anything else you might need to cut cold butter into, which turns out to be quite a lot)
Mixing pizza dough
Emulsifying the ingredients for a classic mayo
In their 2010 equipment review on food processors, Cook’s had rated the KitchenAid KFP750 as “still the one to beat” but this recent update lists it as now discontinued and thus out of their running.
In fact, that’s the order Consumer Reports placed them in: the Breville is #1 and the Cuisinart ranked #3, separated by another Cuisinart model not mentioned at all by Cook’s, the Cuisinart DLC-2011CHB Prep 11 Plus. (Consumer Reports did not factor cost in their overall score, focusing instead on performance, noise, and convenience.)
In any case, given the neck and neck ranking race between the Breville and the Cuisinart, for the extra $200, we figured we could buy a lot of cabbage PLUS this beauty, which we did.
Amazon reviewers agreed with a 4.4 star rating and over 500 reviews.
Two words sum up our feelings on the Cuisinart: LOVE IT! Long-term readers of our blog will know we make a lot of food–soups, stir-frys, pizzas–based on sliced, chopped, or diced fresh vegetables and/or grated cheese. The Cuisinart has drastically reduced our prep time for these dishes, but it still wasn’t clear to us: which was the best machine for which task?
In the past, we had tried to use our Vitamix 5200 for several of these slicing, chopping and dicing tasks, but since blenders tend to want to puree everything into something either slurpable, drinkable or dippable, we gave up and went back to knives and box graters, until we made room in the tent for our new darling.
By following the directions in the short (and delightfully kitchy) instructional DVD that came with it, we now create perfectly sliced mushrooms and tomatoes, grated cheese, diced celery, etc. in the time it used to take us to pull up a stool and pour a glass of wine to sustain us through the job of doing it all by hand.
Zip… et voila! C’est finis!
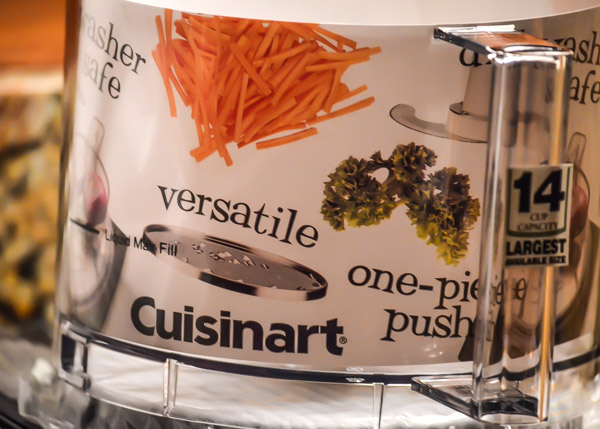
The one task that food processors in general don’t do well is emulsifying or liquifying large quantities. This isn’t because they aren’t up to the emulsification–is that a word?–itself.
I suspect this is in part where the “blender vs food processor?” confusion comes in as they can both do the job. It’s because the food processor container isn’t designed to accommodate that much liquid, and if you push the boundaries, you can end up with one helluva splashy mess on your hands. (Note the tiny “max liquid fill” line on the container in the image above.)
Blenders: Think “Beverages”
In addition to testing for durability, speed, and noise, Cook’s tested the blenders mainly on their ability to pulverize, puree, or liquify whatever was thrown in them. And the winner in the category of best blender is…
We have owned one for years, and again, LOVE OUR VITAMIX. In addition to being an absolute work horse for making our morning smoothies and pureeing soups, it can slush up a mean margarita. But it’s not the only Cook’s approved option.
Aside from the funky name, Cook’s give this their “best buy” rating, and at about half the cost of the Vitamix, 582 reviewers on Amazon.com agree on a 4.2 star rating. But neither the Vitamix nor the Breville win the race at either Consumer Reports or on Amazon’s best seller list in the category: that honor goes to this puppy:
The Ninja Master Prep Professional (QB1004) is ridiculously inexpensive, it performs beautifully, and unless you’re looking for a power workhorse that can make soup and/or chew gravel, almost 2000 reviewers on Amazon agree in 4.4 alignment that it’s a solid bet.
However, on occasion, we at rickandkathy DO want a blender that can make soup and/or chew gravel. Plus, we are Vitamix groupies. (What can we say?!)
The Vitamix also comes with a “dry” container that can, in theory, chop nuts, breadcrumbs, etc., but our experience is that it’s difficult to get a uniform consistency that’s fine enough without accidentally pulverizing stuff into meal. Our new Cuisinart food processor is a much better option for those tasks.
And while the Vitamix can mash together a good smooth hummus (in fact, that was one of Cook’s tests), we have found we prefer the slightly more rustic (read “chunky”) mouth feel we can get with the pulse lever on the Cuisinart.
The hummus example above is one of the crossover possibilities between food processors and blenders and is no doubt another source of the confusion between the two machines. However, for our money (literally), there is more than enough differentiation between the sweet spots of each to warrant making room on the shelf for both.
Two additional pluses to owning a food processor that we didn’t see coming : 1) no more weepy onion eyes, and 2) the ability to cut cold butter into other ingredients means that there are now recipes open to us that we simply couldn’t make any other way: see the recipe for “Creamy Milk Chocolate Frosting” below from our Cook’s Baking Illustrated.
Creamy Milk Chocolate Frosting
Adapted from Cook’s Illustrated “Baking Illustrated“
Makes enough for a 9X13 sheet cake with 1/4 inch frosting. Give it an hour or so to cool before using.
INGREDIENTS
1/2 cup heavy cream
pinch table salt
1 tablespoon light or dark corn syrup
10 ounces milk chocolate
1/2 cup confectioners’ sugar
1/4 c. cold unsalted butter, cut into 8 pieces
INSTRUCTIONS
Heat the cream, salt, and corn syrup in microwave-safe measuring cup on high until simmering, about 1 minute, or bring to simmer in small saucepan over medium heat.
Place chocolate in pieces in the work bowl of a food processor fitted with steel blade. Pulse until the chocolate is coarsely chopped.
With the machine running, gradually add the hot cream mixture through the feed tube. Continue to process for one minute after the cream has been added.
Stop the machine and add the confectioners’ sugar and process to combine, about 30 seconds.
With the processor running, add the butter through the feed tube one piece at a time, and process until it’s all incorporated and smooth, about 20 seconds longer.
Transfer your creamy and delicious frosting to a medium bowl and cool it at room temperature, stirring frequently until thick and spreadable, about 1 hour. Slather on to your cake, let it set, then serve with confidence: this frosting will make anything under it an outstanding success!

 Vacuum-sealed fresh basil in February, baby. Oh yeah.


